


The world is full of amazing sights, if only there wasn’t so much clutter in the way!
Yes, our ‘after’ shot really is the same photo! It just shows what can be achieved with Affinity Photo’s object removal tools, and just how effective they can be.
Serif’s Affinity Photo is an extremely powerful, professional photo editing tool capable of taking on just about any image editing task you can throw at it.
It’s especially good at photo retouching, and this picture we’re using here is a perfect example of the kind of problems you can face when photographing popular landmarks. It’s the amazing Rathaus in Basel, Switzerland, and it’s almost impossible to get a clutter-free photograph of this building. The teeming sightseers are only part of the problem. If you get close enough to keep the tram power cables out of the shot, the perspective becomes impossible, so the only solution is to shoot it from the other side of the street and try to fix up the picture later.
And you can see from the before-and-after comparison just how successful this clean-up operation has been. It’s been done using four separate tools in Affinity Photo, each of which has its own particular strengths for this kind of work.
Step 01
Healing Brush tool
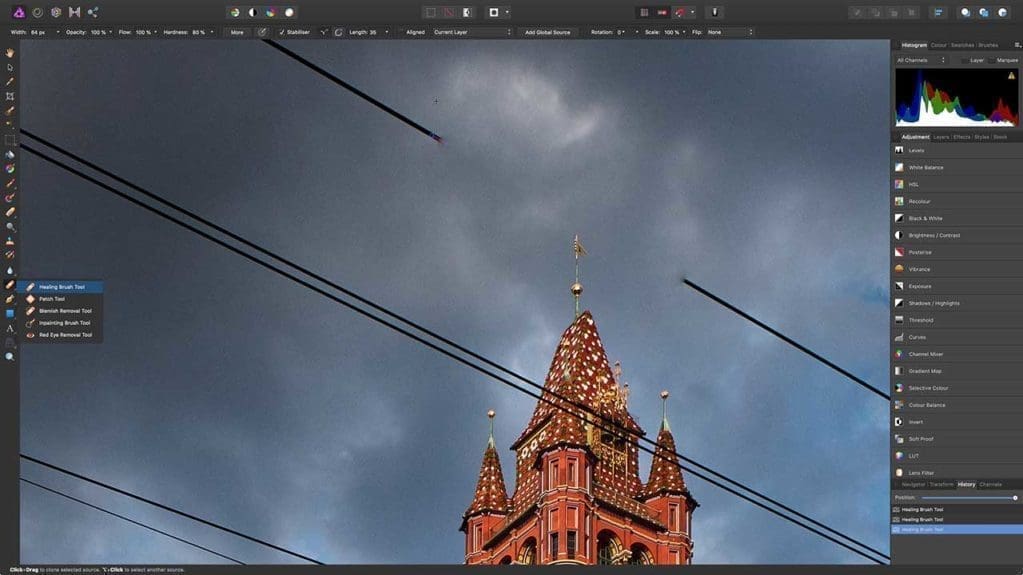 Let’s start with the most obvious problem in this photograph – the power cables. The Healing Brush tool is ideal for this because we can choose the ‘source’ area for the repair (the ‘clean’ sky either side of the power lines) and then just paint over the lines. It works like magic, because the Healing Brush tool matches the tones and colours of the area you’re repairing.
Step 02
The repair so far
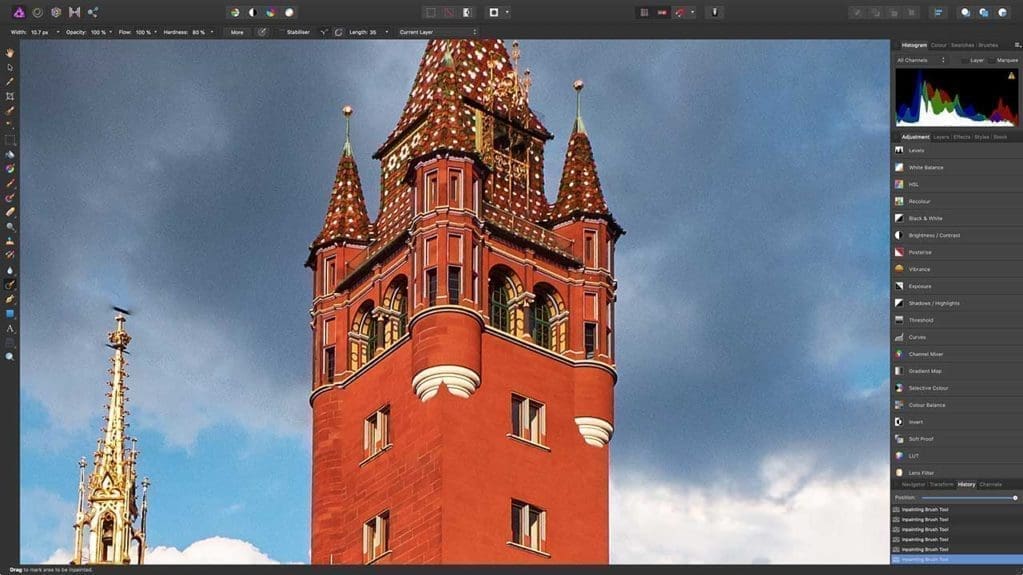
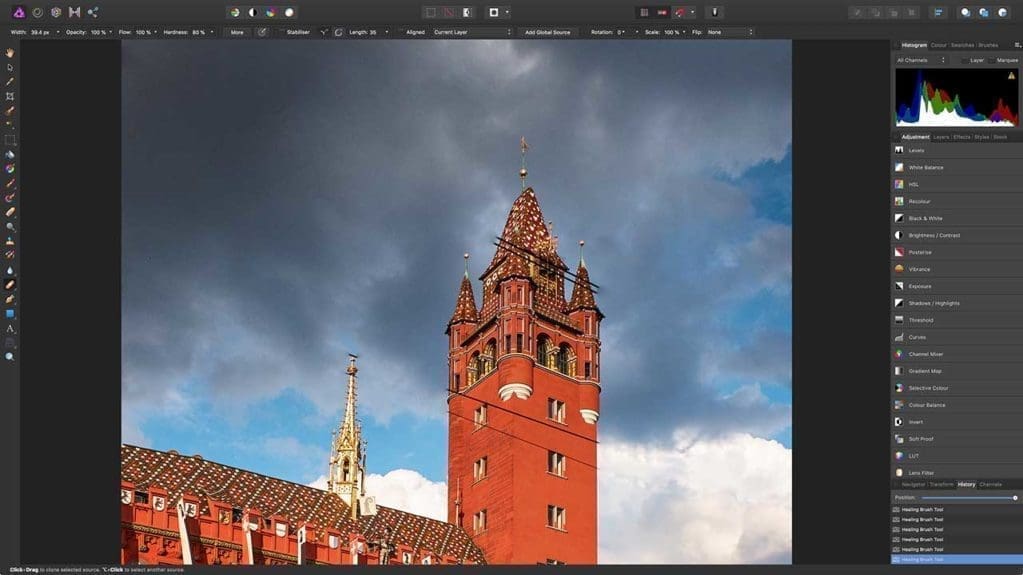 You’ll see from this shot that we’ve stopped short of the tower and haven’t tried to remove the power cables over this more complex detail. That’s because we need a different tool for this – the Inpainting Brush. This is perfect for areas of fine, complex detail, automatically pulling in details from the surroundings to fill the repair.
Step 03
Inpainting Brush tips
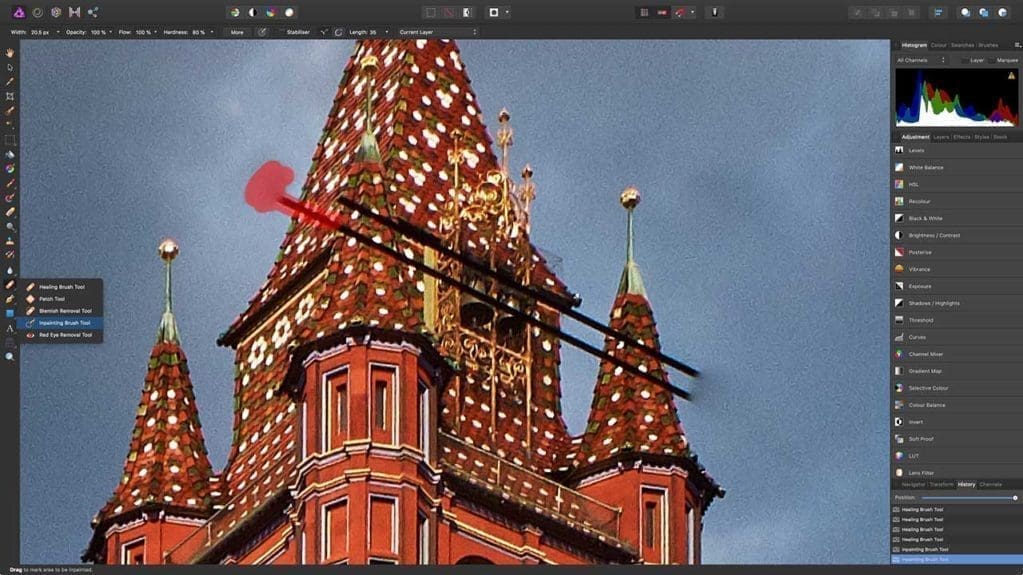 The Inpainting Brush is very straightforward, but there is a knack to getting the best results. To use it, you just brush over the object you want to remove – it’s highlighted with a red overlay as you brush. To complete the repair, simply release the mouse button. You’ll get the best results if you use a small brush and follow the object’s outlines closely.
Step 04
Inpainting results
 The result is pretty amazing and took only a couple of minutes to achieve. There are a couple of outlines and details which have been disrupted, but they’re so small they are hardly visible at this magnification and can be fixed quickly with the Clone Brush later. We can use the InPainting brush to remove the last bits of power cable from the pinnacle on the left, too.
Step 05
Removing pedestrians
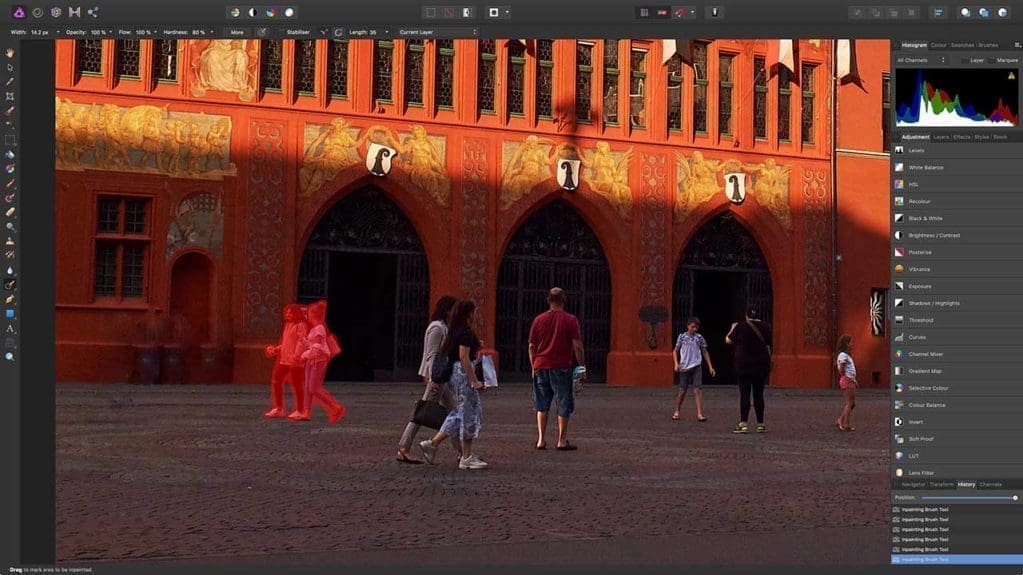 So if the Inpainting Brush worked so well on the power cables, can we use it to remove all these pedestrians too? The secret again is to use a small brush and follow the outlines quite closely. Sometimes people will disappear as if by magic, sometimes the background can be slightly messed up, but that’s easily fixed with the Clone Brush in the next step.
Step 06
When to use the Clone Brush
 The Clone Brush is perfect for precise repairs on backgrounds which have been smudged or distorted by your other repairs. To use it, alt-click on the area you want to use as the repair ‘source’, then paint or ‘dab’ on the area you want to repair. Here, we’re rebuilding (right) the smudged details in the arches and walls (left) that were left behind when we removed the people.
Step 07
The Patch Tool
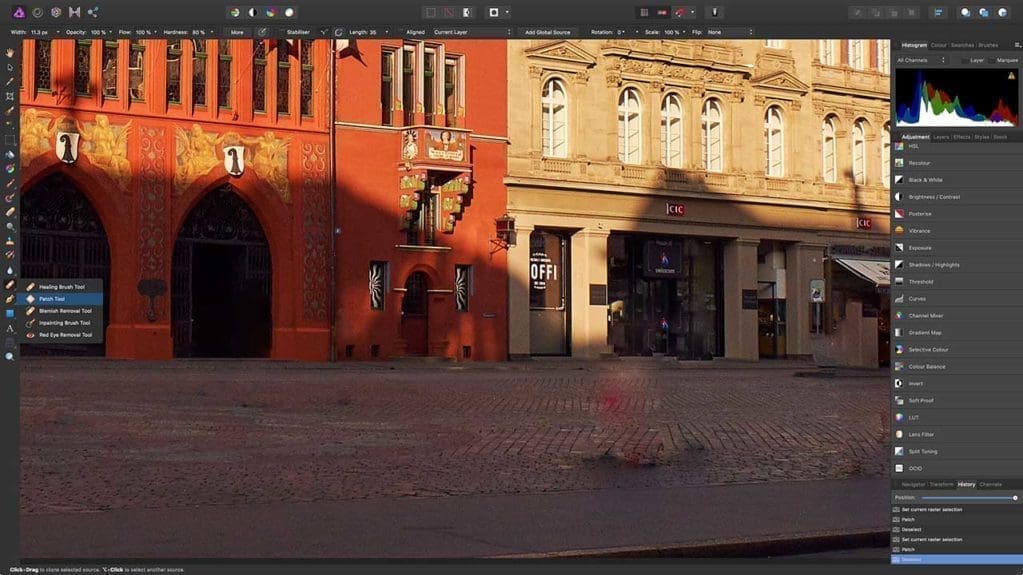 We’re nearly there now, but we’ve still got problems with the paving in front of the building, which has been left with smudges and patches of colour by the Inpainting tool. The Healing Brush would smudge these areas, the Inpainting Brush would simply shift these patches around and cloning would take too long – so this is where we need the Patch Tool.
Step 08
Repairing larger areas
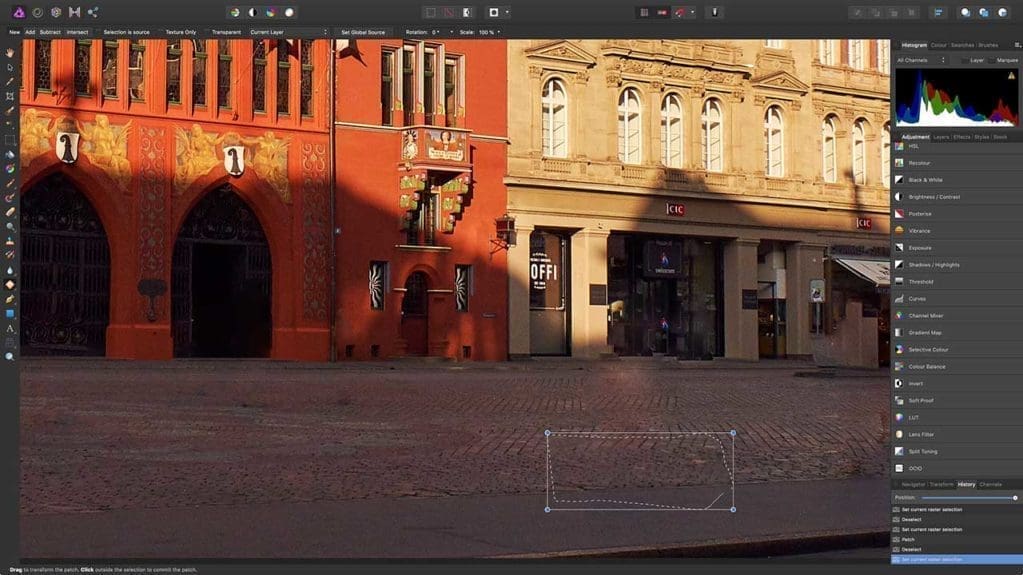 With the Patch tool, you drag around the area you want to repair to select it (the selection closes automatically) and then position the identical ‘source’ selection to choose the area you want to use for the repair, lining up any obvious details or patterns. Click once to confirm the source area and again to complete the repair – after a couple of minutes’ work, we’re done!
You do need to make a sensible decision about which images can be repaired and which can’t, but our example shows that even the worst kinds of clutter can be removed in Affinity Photo with surprisingly little work. The secret is to know which tool to use, and how to get the best out of it.
Where to get Affinity Photo
Mac owners can get Affinity Photo from the Apple App Store, while Windows users can buy it directly from the Affinity Store.
#CameraJabber