

Mounting a GoPro to your bike is one of the easiest options when it comes to capturing fantastic footage. Yet, while sticking a camera on your helmet or handlebar is an easy option, there are plenty of other lesser-known nooks and crannies on your bike ideal for fixing GoPros.
Take the rails under your seat, downtube, crossbar or even the wheels quick release. Your bike is an excellent ready-made mount, all you need to do is find out the best position and then get out and ride.
Before you start, it’s worth knowing a few basics about the bike mounts that are available and also a few techniques that will help transform your footage.
Let’s start with the basics; The helmet and bar mounts.
Mounting a GoPro camera on your helmet
A helmet mount is a great way for the GoPro to get a POV perspective. One thing to note, however, when using a helmet mount is that the action however fast will probably playback slower than you remember, that’s due to the perspective rather than the speed you were cycling.
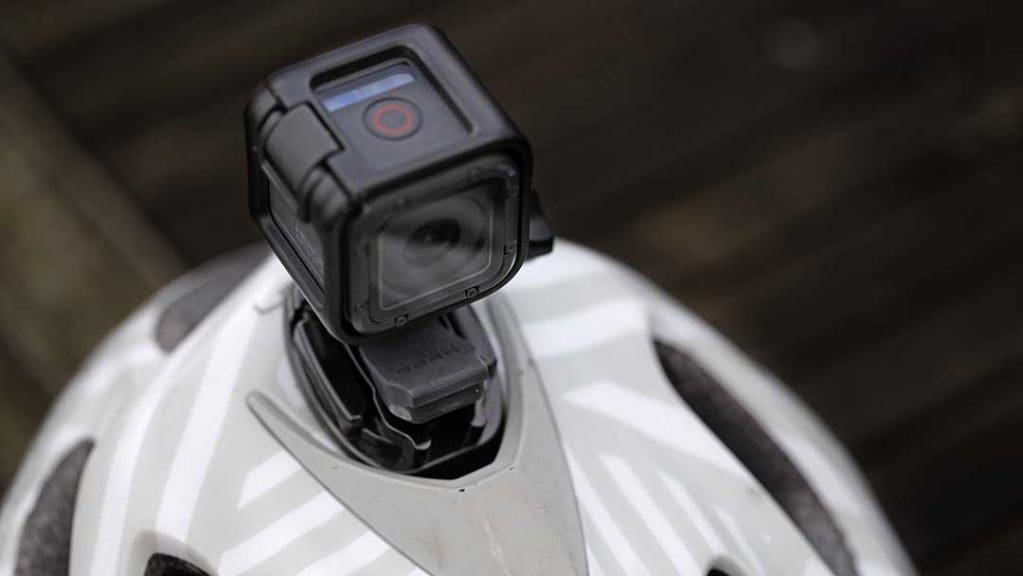
Helmet cam is often useful when mixing with other angles especially if you’re using several cameras or switching between mounts during your ride.
When it comes to applying the mount make sure the area of the helmet you’re going to stick the mount too is clean and dry. It’s worth giving it a good wipe with a wet cloth and then leaving it to dry for an hour before you apply the mount.
Pick a place on the helmet that has a completely flat surface, these days most helmets will have a dedicated area for GoPro mounts, but it’s still worth taking note.
Also, you’ll find two types of adhesive mount one flat and the other curved, pick the one that gives that mount the most surface contact with the helmet.
Once applied, leave the sticky to set for around 12 hours. Although it may seem stuck fast as soon as you apply, it takes a few hours for the glue to go off.
Never, restick a mount if it comes off, as the sticky is only stick once. If you try to reuse an old mount, then you’re likely to lose the mount and attached camera.
With the mount now applied you can pop on the camera. Make sure you only use the quick release clip and don’t add any of the short extension pieces as this can cause vibration and wobble.
As well as the standard GoPro helmet mounts you can also get poles which stick out over the edge of your helmet. These can capture fantastic POV footage of you riding. When using these mounts, the same procedure applies when using the stickies.
Also, try to balance the weight of the camera on the pole, you can use a zip tie to harness to your helmet or add weight to the end of the pole. You’ll see what I mean when you try.
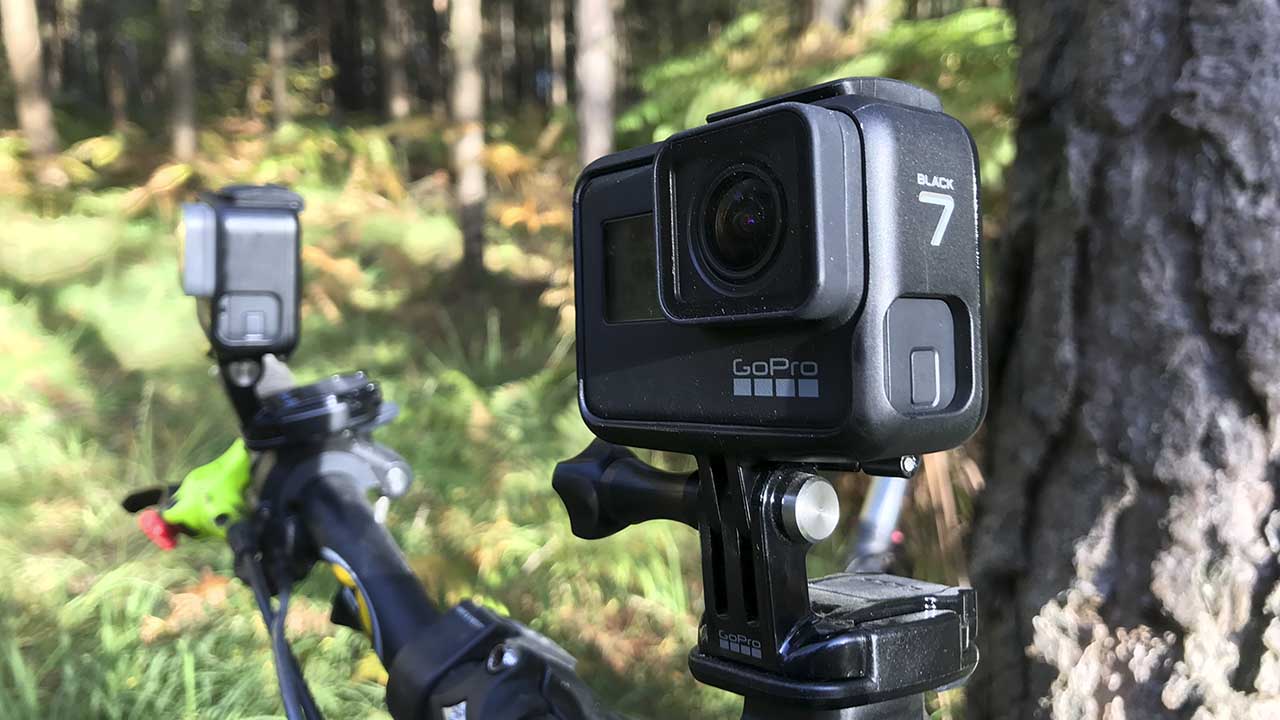
Attaching a GoPro handlebar mount to your bike
This is probably one of the most popular mounts going, and there’s a huge selection of manufacturers making them, including GoPro.
So far I’ve only found a handful that are any good. Even the official GoPro one is a little ropey when it comes to vibrations, but is probably the best for the price out there.
If you want one that will offer you the best quality take a look at the all-metal versions from K-Edge. These are solid and vibration free and even without HyperSmooth engaged will enable you to capture spectacular footage.
If you do use the GoPro style of clamp make sure you select the correct sized rubber shim for your bar type. Once in place also make sure it’s clamped down tight, and you switch on HyperSmooth or image stabilisation to cut out the inevitable vibrations.
Adding a GoPro seat mount to your bike
This really is a secondary mount and sits under the saddle and attaches directly to the rail bars.
The design is usually full metal although I have seen plastic ones that I would highly recommend avoiding.
K-Edge again makes a superb version, and it fits most saddles I’ve fitted them to over the years. There’s also a newer GoPro version which is very good and again all metal construction.
When fitting again make sure the rails are clean and give them a good wipe down before you start the installation.
I also put a dab of Loctite on the screws just to ensure they stay in place and don’t work free over time.
The perspective you get from the camera will be upside down and of your rear tyre, but when cut in with visuals from other cameras the effect can be dramatic.
If using the mount it’s worth making sure your camera has auto orientation switched on, this saves you having to flip the video before editing.
Mounting a GoPro camera on your wheel skewer
This is a dynamic view and angle that impresses people, and is one for road bike cyclists or at least those with a traditional style of a skewer.
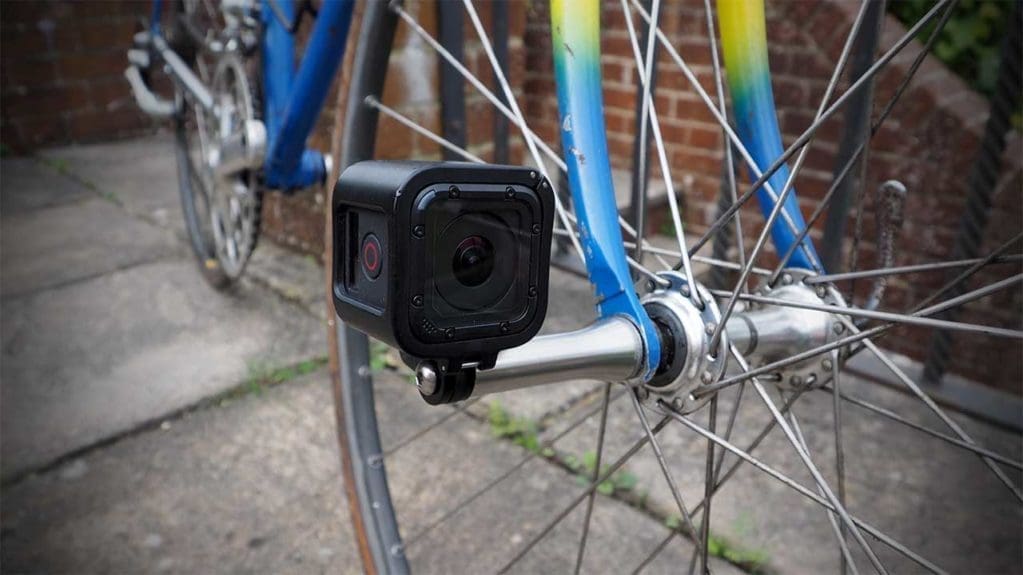
The mount replaces the end nut of the wheel skewer and sticks out slightly from the side of the wheel. The perspective is like nothing you’ve ever seen and adds to the dynamics of the video.
I’ve used these again as a secondary mount, and although they can be used with mountain bikes, there is always the fear they’ll get caught on something.
However, throwing caution to the wind, I’ve attached the Nut-R to my old S-Works Steel on many, and the footage is fantastic.
Over the bar view with a GoPro chest mount
The chest mount is a GoPro staple, and some of the most common and spectacular GoPro footage has been captured using this type of mount.
It’s essentially a harness, pop it on, bolt on the GoPro and you’re ready to go. The over the view perspective of the bar as you ride is impressive; it can also highlight any mistakes that you make when riding the trial.
When using the chest mount, the GoPro is mounted upside down, use the auto orientation feature to ensure that the footage is the correct way up unless you’re bungee jumping in which case good luck.
Again as with the helmet and bar mount the chest mount makes a great primary camera position.
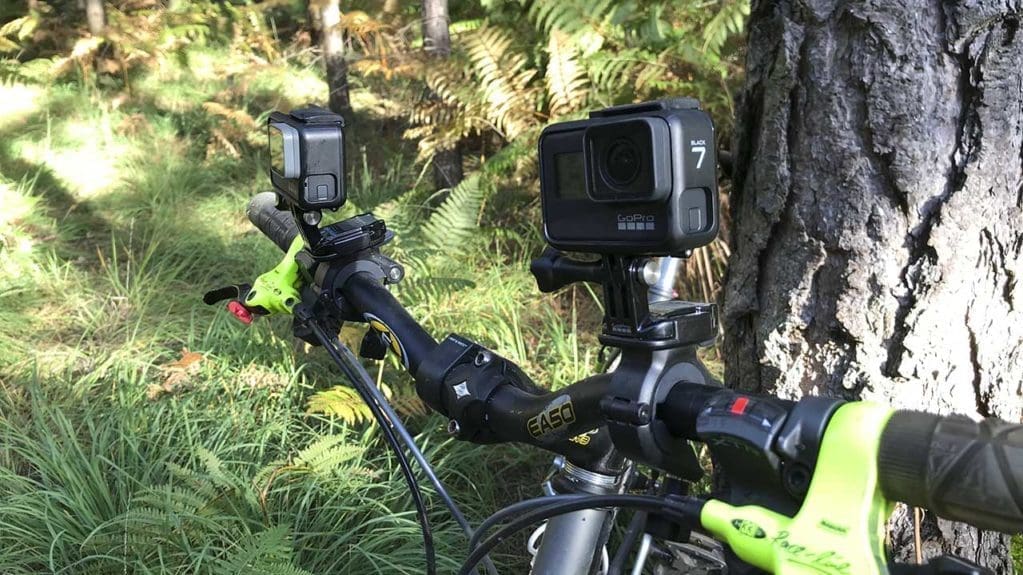
Using multiple GoPro cameras on your bike
Keeping just one position can be boring, so to liven up your footage by swapping your camera between different positions to get alternate perspectives.
Or, take it to the next level and if you’re out cycling with friends who also have GoPro’s switch between cameras when it comes to the edit.
A good idea here is to sync all the cameras crudely. If one of you shouts start recording and then once all cameras have started one of you claps as loudly as possible, you’ll have an audio key to sync the clips when editing.
Using remotes and apps
GoPro has a handy Apple Watch App thats great for starting and stopping recording. The app itself is simple but effective. Alternatively, you can use the GoPro Remo, which you can mount on your bars as an easy way to start and stop recording when your GoPro is mounted under the saddle or on the wheel.
Using GoPro’s HyperSmooth or image stabilisation for your cycling video
Many people stay away from image stabilisation but the improvement in the quality of your footage with this feature switched on is incredible.
Whatever GoPro mount you use when cycling make sure you have Image, or HyperSmooth switched on.
There are plenty of GoPro cycling options if you have any suggestions or would like to join the discussion leave a comment in the box below or pop me an email.