
You’ve been out taken a card’s worth of images come home and downloaded them to your computer, but what next?
There’s the obvious sorting and organising of files, ensuring that you can find them again in the future, and of course, selecting the best to print. But there will be plenty of others that you’ll want to keep and store.
What you need is a viable storage solution, something that will ensure that you have all your files safely backed up and ready to go when you need them.
There’s a general rule for keeping your files safe, and that’s to back-up. This means ensuring that you have more than one copy of your data. The easiest way to do this is to duplicate all your data onto another drive.
But then what happens if you have a flood, get burgled, your house burns down, or you get a virus. All that digital data including your photos will be lost.
It’s, therefore, a good idea to have a third option, off-site back-up.
When it comes to backing up your image files securely, you need a two one approach. Two onsite back-ups; computer and external HD and one off-site in the form of a cloud storage solution.
Backup for digital photos and video isn’t so easy
All the common suggestions for backup are perfectly good if you’re a normal user, but what if like many photographers you have hundreds if not thousands of images backed up on external hard drives?
These files, especially with the latest cameras are not small, you could be talking terabytes, so what to do.
There are two options either increase your internal HD space to accommodate all those extra files or buy an external.
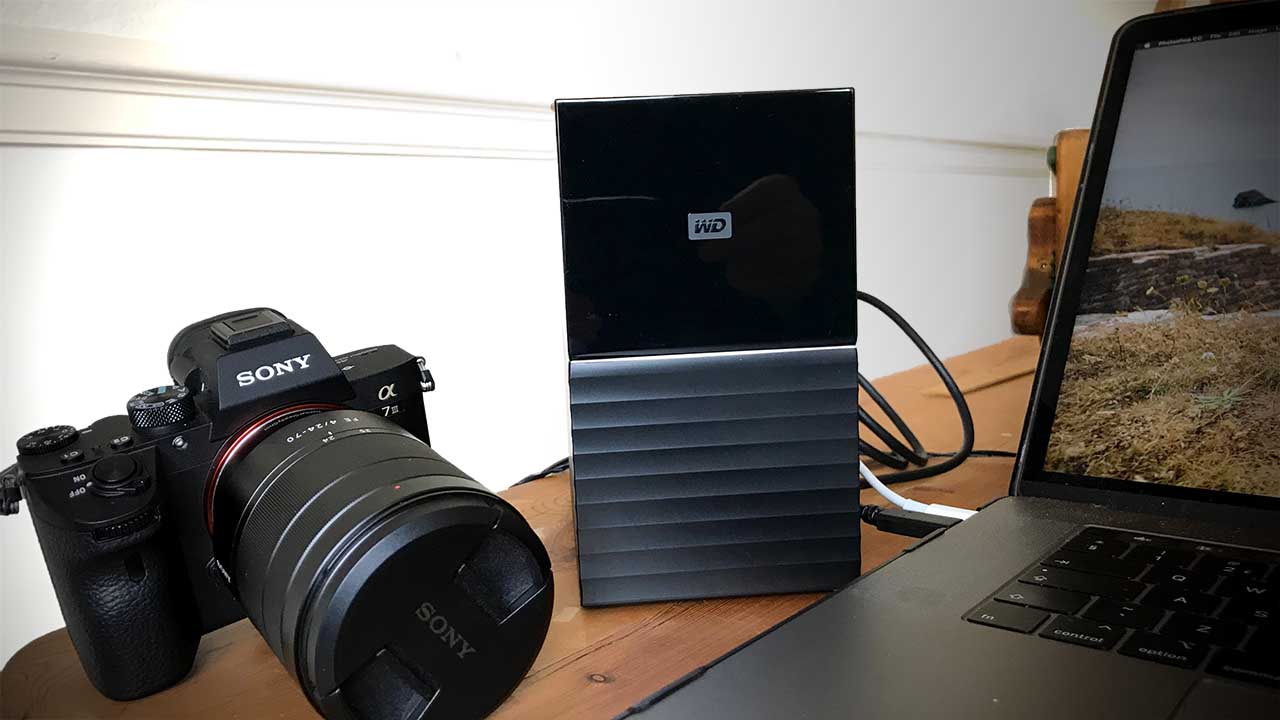
If you do opt for an external, there are several options, but realistically you need a RAID or Network RAID drive. A standard RAID drive essentially mirrors one drives content onto another. This way there are always two copies of the files. These drives, such as the WD My Book Duo, plug into your computer and once formatted in the right file system can be used in the same way as any other drive.
The other RAID options is a network RAID drive. This plugs into your router and then can be accessed through the Network. Generally, home networks speed don’t allow you to work directly with files on the drive, so it’s a better solution for full automatic file backup or archiving your photo’s and video.
One solution that should be avoided is a single external hard drive solely used to store your images. If that fails, then you will lose everything.
The best solution for photographers is a direct attached RAID drive that enables you to copy files to and from it, as well as working directly.
If you use a RAID attached drive, then this negates having to have a secondary onsite backup solution for your image and video files although it’s still worth having another backup for the rest of your system.
Onsite backup solutions
Onsite back-up is the easiest option to solve especially if you’re a Mac user, but there are some great PC backup software options out there as well. Some external HD manufacturers such as Western Digital suggest software such as Acronis True Image 2019 which is a great all-round solution for both Mac and PC.
When it comes to onsite backup (backup at home), there are a few ways to tackle the issue.
Backing up photos for beginners: Mac systems
If you’re running a Mac, then life is pretty easy, plug in an external hard drive that either matches or is greater than the size of your computers hard drive and then select use Disk as Time Machine from the popup window.
A note of caution, most external HDs arrive formatted for PC or with a file system that can be read by both Mac and PC. The most common in ExFat, great if you want to have a disk that will be readable across multiple platforms but terrible if you need to rely on that disk not to lose your data.
Before using any drive for backup make sure that it is in the correct format for your system.
These days most manufacturers will include applications on the new disk that will recognise the type of system the drive has been plugged into and will then ask if it’s OK to optimise the disk for your system.
In all cases you must do this, leaving the disk as ExFat will make your data vulnerable. If the disk you have bought doesn’t prompt you to format it then.
- Open Disk Utility
- Select the disk from the list on the left
- Select “Erase”
- Select Mac OS Extended (Journaled)
- Give the disk a name
- Click Erase
Now eject the disk and plug it back in and the TimeMachine options will reappear. Select the disk and click OK.
You now have the external disk automatically backing up your entire machine and making a complete duplicate of everything including your photo’s.
Use this backup for your system and a RAID attached drive such as the WD My Book Duo for your images and video.
Backing up photos for beginners: PC systems
On PC things are a little more tricky, you can use restore points, but this can get complicated. The easiest thing by far is to select a disk that includes backup software or purchase software such as Acronis True Image 2019. This software works for both Mac and PC systems and is one of the most comprehensive backup solutions out there.
In both cases once installed select the folder that includes the files you want to backup, follow the instructions and again all data will be backed up directly to the external disk.
As with the Mac backup process, it’s essential that you have the disk formatted correctly. On PC Systems reformat the disk and select NTFS.
Two on-site backups of your digital photo files
After attaching a drive and running through either the TimeMachine or True Image 2019 process, you’ll then have two complete backups of all of your files on site. One on the computer and one on an external drive.
If one drive files, then you have another copy of all files that can be used to quickly restore, or not so quickly if it’s terabytes, of data.
Off site or cloud backup
Once you have your storage solution sorted on the hardware front, it’s time to look at an off-site solution.
Again here Mac users have it relatively easy with iCloud offering a complete cloud-based solution, although as the capacity expands so does the cost.
PC users will need to look for another solution, and here again, Acronis True Image offers Cloud Storage for a decent price.
There is another solution for both Mac and PC, and that’s BackBlaze, this is just one of many services out there, from experience, this seems to be one of the easiest to use and well priced.
Archived DVDs
Hard drives are all well and good, but with moving parts, all hard drives will eventually degrade and break.
Another option for files that you’re not going to need for a while is Archive DVD. These cost a fair bit more than your standard writable DVD’s but will last for up to 1000 years.
Again it’s always worth making a double back-up of anything copied to these disks and do make sure you read the manufacturers recommendations for storage.
Using RAID Drives for high volume accessible storage
My prefered choice for backup is to use a RAID drive. I have a 2TB software RAID in the machine and 6TB hardware RAID externally.
When selecting a RAID drive there are several options, I won’t go into the technicalities, but if you have a 12TB My Book Duo and configure it as RAID 0, then you’ll have access to 12TB of fast storage.
Great for working but not great for keeping all your files safe in the long term.
That same drive can be set as RAID 1, in which case you’ll have 6TB of storage with each drive mirroring the contents of the other.
RAID 0 is used when speed is essential, say on a working drive, RAID 1 is applied on an archive or storage drive.
Using Network Drives for long-term storage
If you don’t need to access the drive quickly and don’t want to think about the drive at all, then it’s worth looking at a Network attached drive.
These generally plug directly into your router and can be used as a backup solution. You can use them to store all your media, audio and video files so they can be accessed anywhere in the house and some enable you to access them from anywhere with an app.
Generally, when it comes to storage, a Network drive is an ideal overall onsite backup solution where you can store everything. It’s also handy if you need to grab an image or video when you’re out and about as it will be accessible remotely, with the right software of course.
Back-up summery
Back-up is a serious business, and you need to keep up with what’s stored where and how it’s stored.
There are a few golden rules, never store your images, video or for that matter any data on just one drive. If it fails you lose it all.
Keep two copies of your files on site; one on your machine and one on an external or secondary drive.
If you store large amounts of data such as images and video on an external drive, then make sure that drive has a mirror, the most straightforward solution is a RAID 1 drive.
For all onsite files make sure you have an off-site back-up. There are plenty of services out there such as iCloud and BackBlaze.
If you have any questions or comments, then please let me know at ali@camerajabber.com
i want to back all the videos on my system up