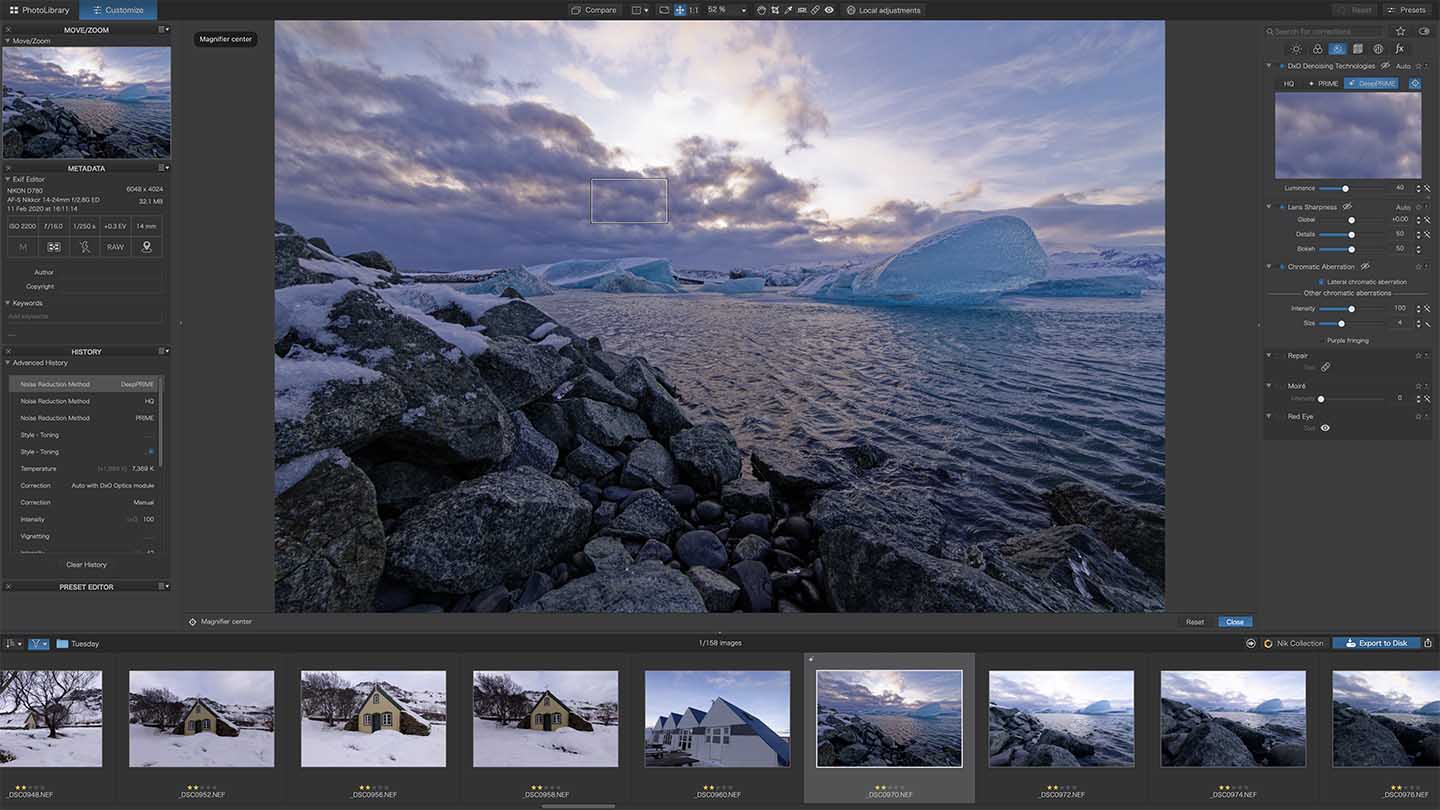
As I said, you can double-click on an image to open it in DxO PhotoLab’s Customize section. Alternatively, with the image selected in the PhotoLibrary, just click on the Customize tab.
All the adjustment controls are arranged in a column on the right of the Customize screen while the key settings and editing history are shown in the column on the left. The image preview is at the centre of the screen.
Taking Control
DxO has divided the adjustment parameters into sections, each with its own icon. Clicking on the icon takes you through the sections which are named Lights, Color, Detail, Geometry, Local Adjustments and Creatives.
There are arrows next to the key adjustment parameters in each section in the column. You can click on these arrows to expand and contract the controls so you see more or less as you need.
Expanding a control reveals its sliders. These operate between -100 and +100, with zero being the default setting. The value can be adjusted by moving the slider, tapping on the up or down arrow or entering a numerical figure. It’s very intuitive.
A blue marker shows which adjustments are applied. You can turn off an adjustment by clicking on the blue marker.
PhotoLab 5 has a star next to each adjustment parameter in the control panel on the right of the screen. Clicking on a star turns it blue and marks it as a favourite. Then, when you open a new image for editing, you can click on the star icon above the control section icons to reveal your favourite adjustment parameters.
Next to the star at the top of the control panel, there’s a small switch icon. Click on this to turn it blue and all the applied adjustments are shown.
On the basis of the installed camera and lens module, the software automatically applies a few adjustments including DxO Smart Lighting, Vignetting, White Balance and Color Rendering, but you can adjust the intensity of their impact or, as previously mentioned, turn then off with a click on the blue marker. When the marker is grey, the adjustment isn’t applied.
Noise Reduction – DxO DeepPRIME
DeepPRIME is DxO’s latest noise reduction algorithm and it works incredibly well, transforming images shot at high sensitivity (ISO) settings. It’s also very easy to use, but the preview isn’t applied to the full-screen image, you can only see it in a small window in the control panel – as shown below.
DxO DeepPRIME is located within the Details tab in the controls. It’s alongside the alternative noise reduction methods, High Quality and PRIME. It’s simply a case of clicking on DeepPrime to select it.
Just to the right of the DeepPrime button, there’s a small circle with a cross on it. If you click on this, you can then click on the main image preview to select the are that you want to preview with the noise reduction applied.
With the squishing of images that’s required to make a fast-loading webpage, it’s hard to show the impact of DeepPRIME here, but the images below give a taste – click on them for a larger view.

Whole Image
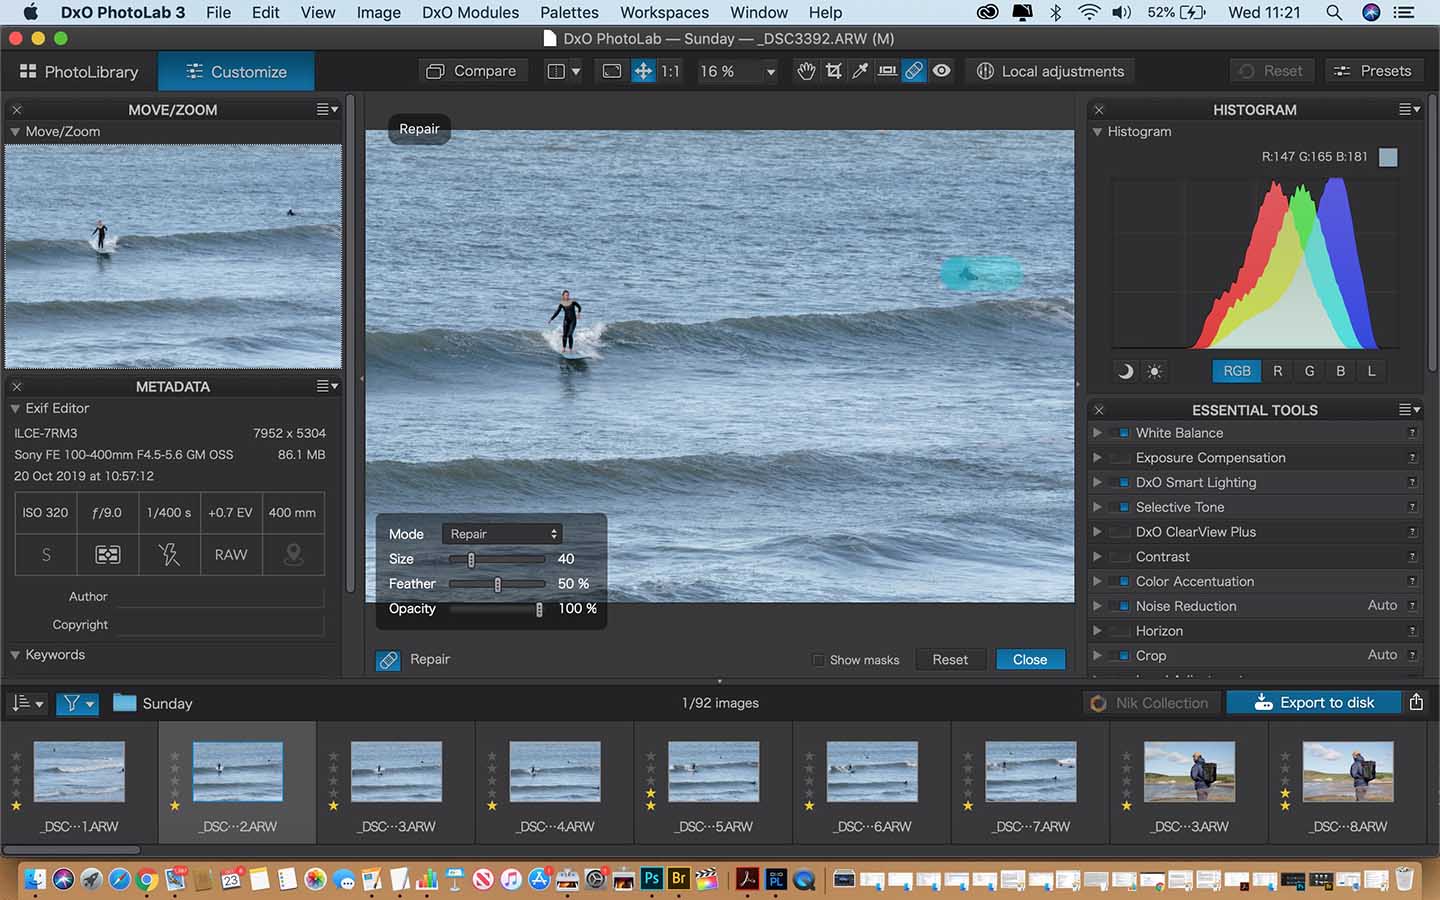
Repair Tool
One of the most important edits that needs to be made to an image is to clone out any dust marks. Version 3.0 of DXO PhotoLab introduced an improved repair tool that can be switched between a clone and a repair tool.
It’s also possible to adjust the size, feathering and opacity of the tool. These changes can be made before or after the repair is made, and if you need to you can move the sample area that is used to make the repair.
You can also make further repairs within the cloned area. That’s tricky with some other editing packages.
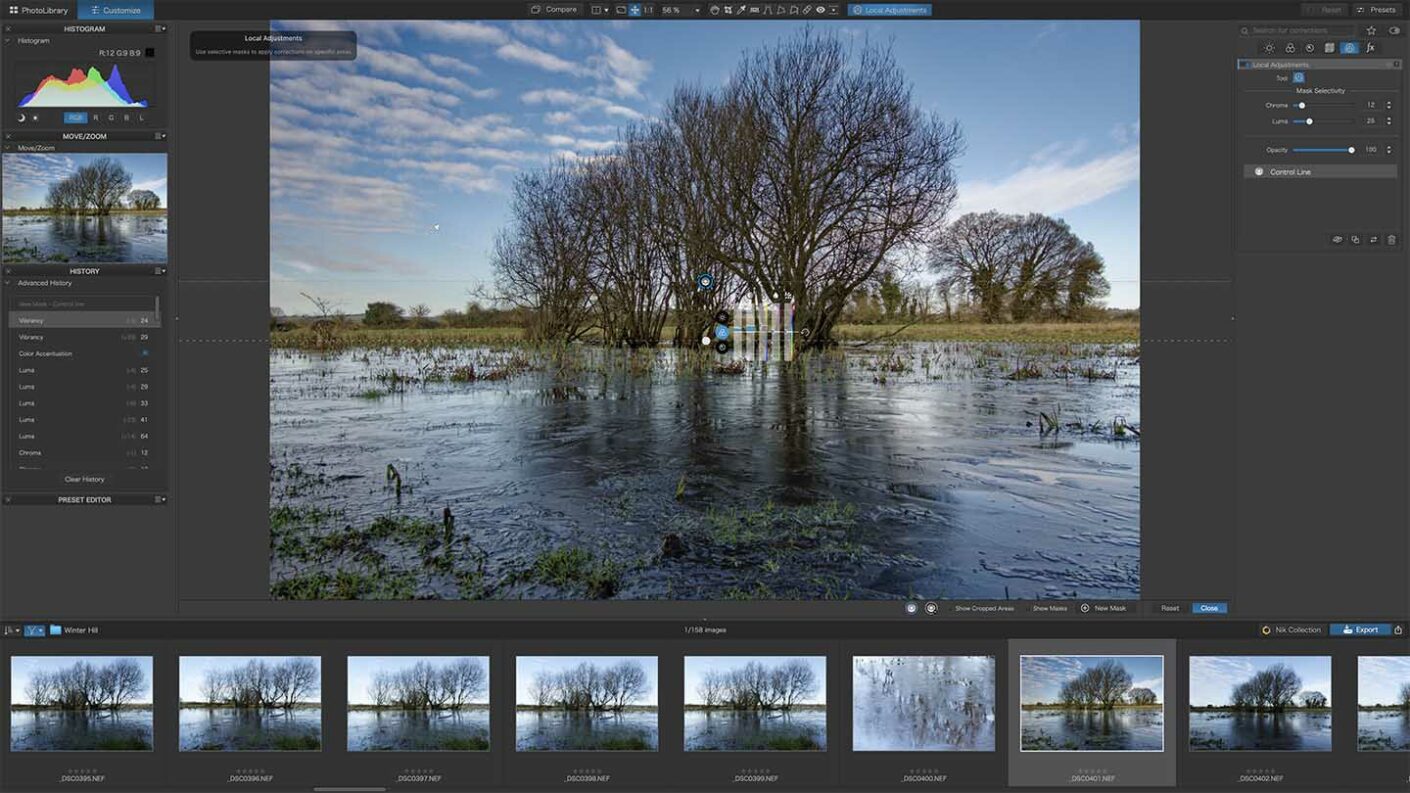
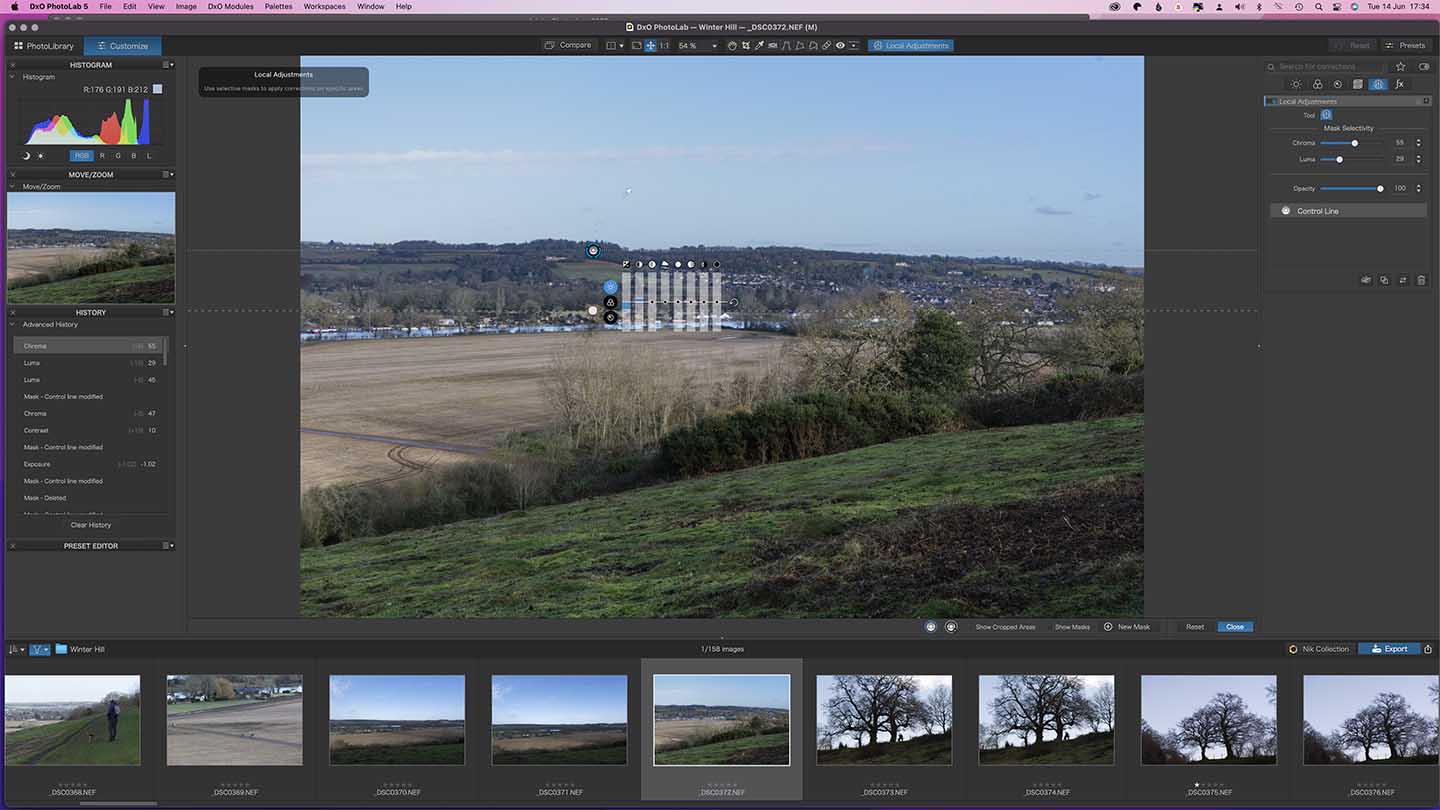
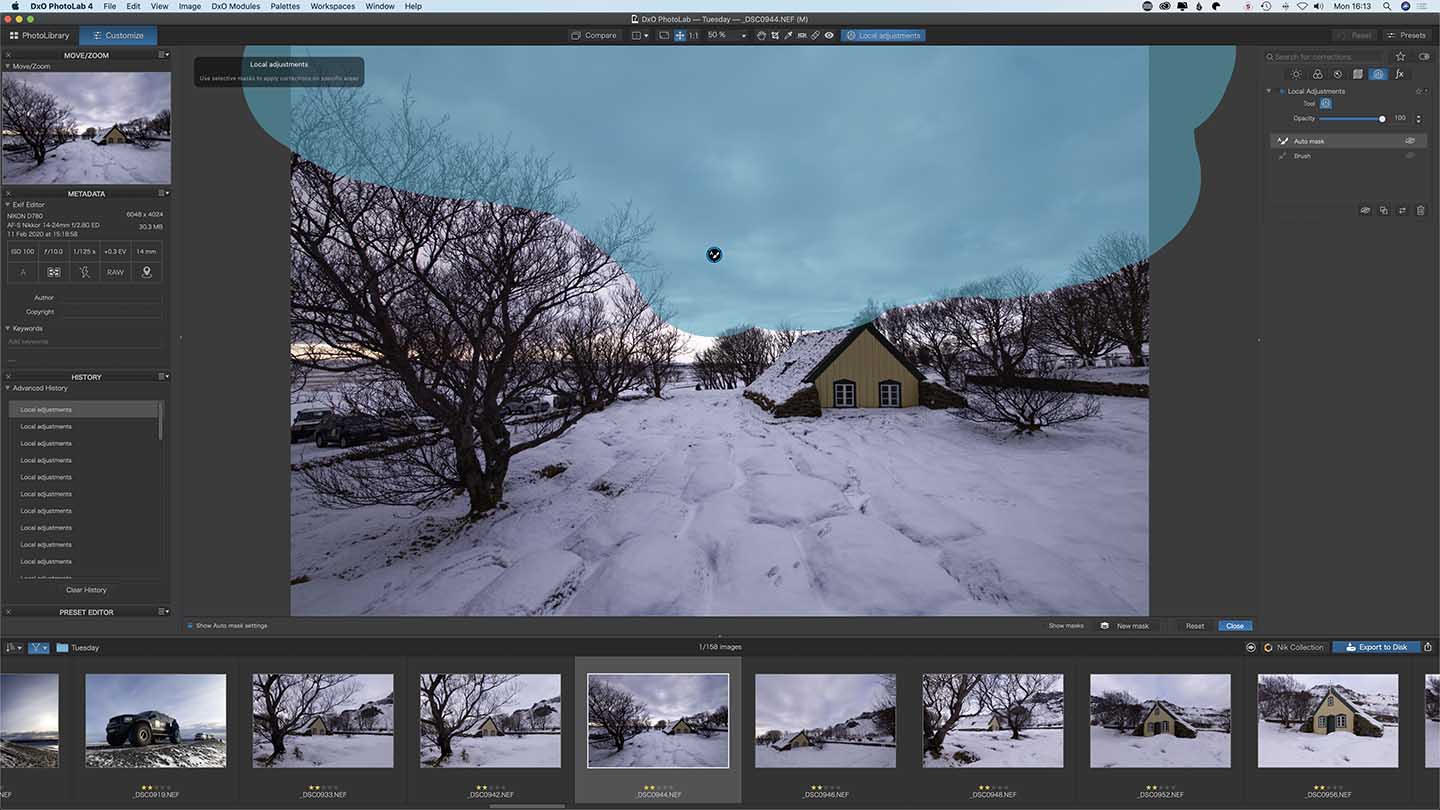
Local Adjustments
As with the previous versions of PhotoLab, at the top of the screen, above the preview, towards the right of the row of tools, there’s a ‘Local adjustments’ option. Once this is selected, you can access a range of tools by right-clicking (control-clicking) on the image.
Along with a brush, Graduated filter, Control Point and Auto Mask options, PhotoLab 5 offers a Control Line option. A Control Line is like a Gradient filter, but it enables a new level of control over the area adjusted. Instead of just applying the effect with just a gradual transition, the adjustment can be targeted to areas of specific colour and brightness using the Chroma and Luma sliders in the Local Adjustments panel in the column to the right of the screen.
As you tweak the Chroma and Luma controls you’ll see the effect of the adjustment applied to a wider or more limited area of the image. It’s just a case of tweaking it by eye until you’re happy.
The Chroma and Luma targeting controls are only available with the Control Line and Control Point local adjustments.
The Local Adjustment tools also include an Eraser to paint out the mask that you apply while the New Mask option allows you to apply another adjustment using the same tool.
When the brush is selected, you just need to paint over the image where you want to apply an adjustment.
A box on the screen gives you control over the selection tool. You can adjust the size of the brush, the degree of feathering, its flow and opacity. PhotoLab shows the mask (in blue below) so you can see which areas are being adjusted. Holding down the Alt/Option turns the brush into an eraser to remove the mask.
Whichever adjustment tool you use, the collection of sliding controls becomes visible once the mask is applied. These have three levels. The top level has 8 sliding controls over brightness and contrast. Beneath that, lie the colour controls which allow you to adjust vibrancy, saturation, temperature, tint and hue.
The detail controls are at the bottom of the pack. These allow you to tailor the level of sharpening and blur.
It’s easy to paint in the mask and make adjustments.
Helpfully, you can duplicate a mask in the control panel and then invert it, which means you can treat two parts of an image differently but you only need to paint in one mask.
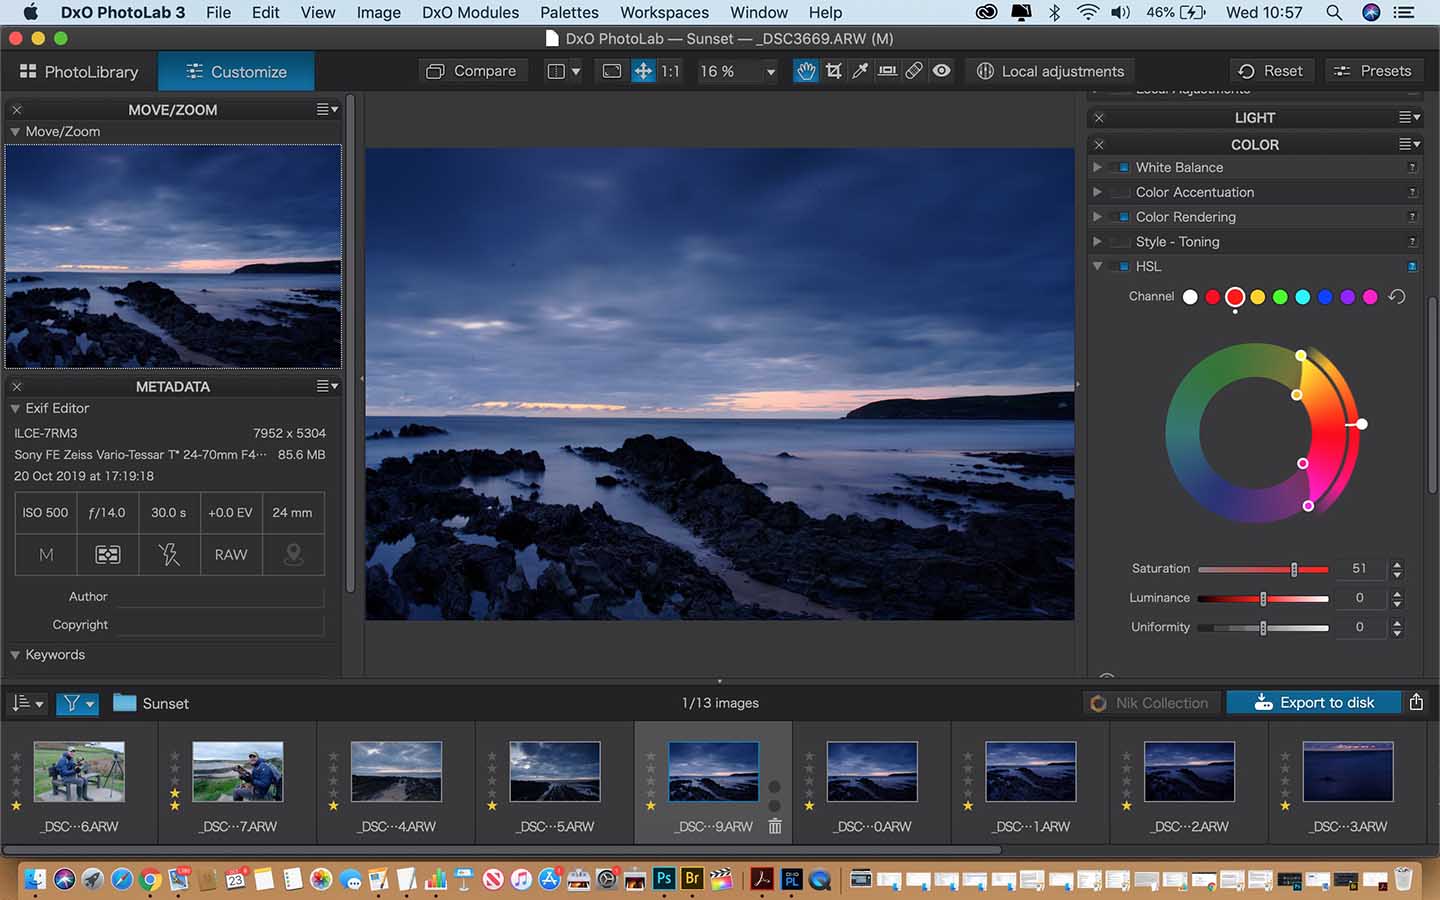
Colour Wheel
PhotoLab 3 introduced a new colour wheel control in the HSL (hue, saturation and luminance) panel. The coloured disks above the wheel set the starting point for your adjustment.
You can then move the points around the outside of the ring to specify the colours that you want to adjust, while the inner ring sets the range of the feathering. This is designed to avoid harsh transitions.
Once the selection is made, you can adjust the saturation, luminance and uniformity. It’s a really quick and easy way to adjust specific colours in an image.
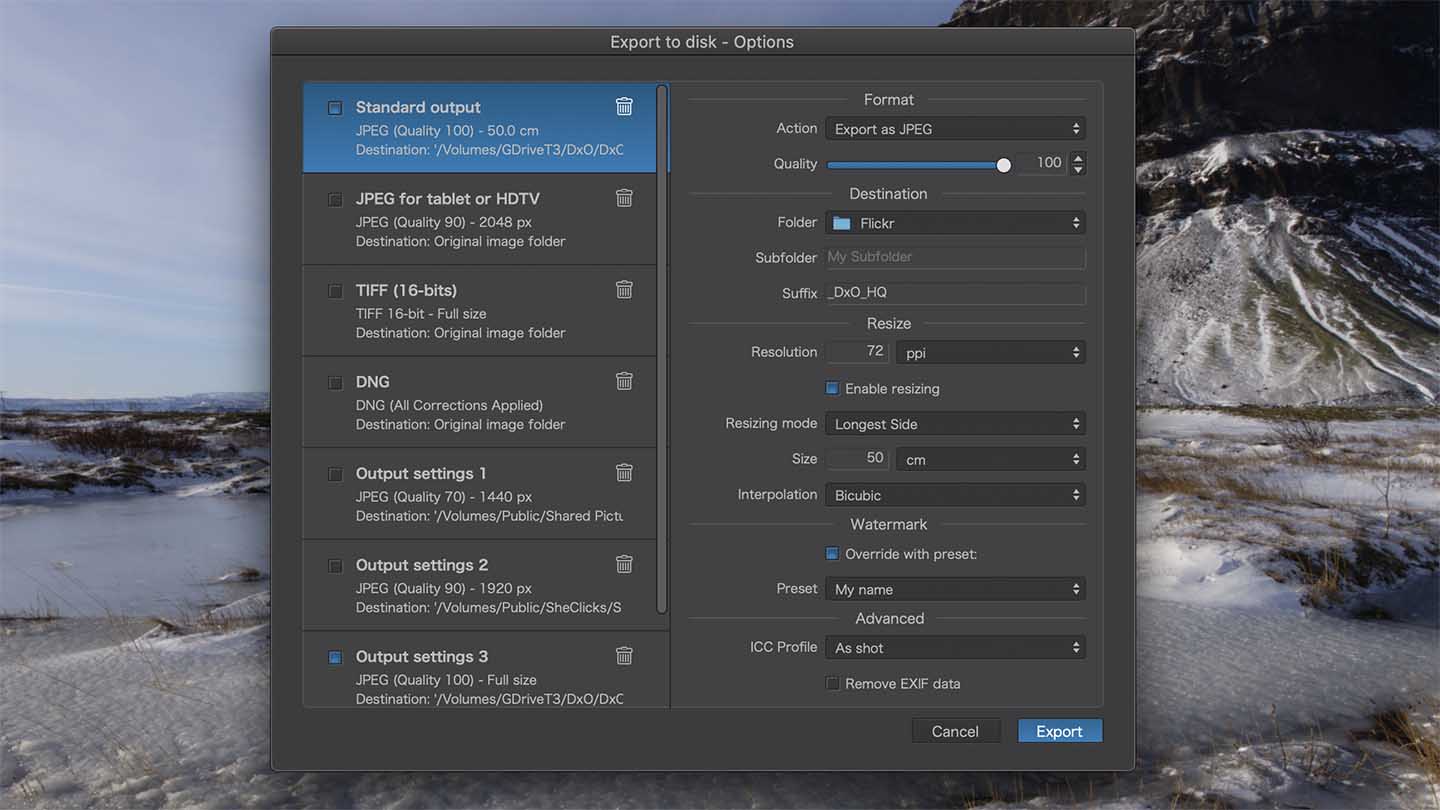
Instant Watermarking
DxO PhotoLab 4 debuted a quick and easy-to-use watermarking feature located in the Creative section. It allows you to add text and/or an image to your images.
The text Watermark controls let you write the words that you want to use, set the font and size, adjust the scale and location (1 of 9 points across the image). You can also change the blending mode and opacity of the text. There are similar controls for the image, which can be uploaded from within PhotoLab as a Jpeg or a PNG file.
Usefully, once you’ve finished creating your watermark you can save it as a preset that you can apply to other images. You can even create a selection of preset watermarks for use in different situations.
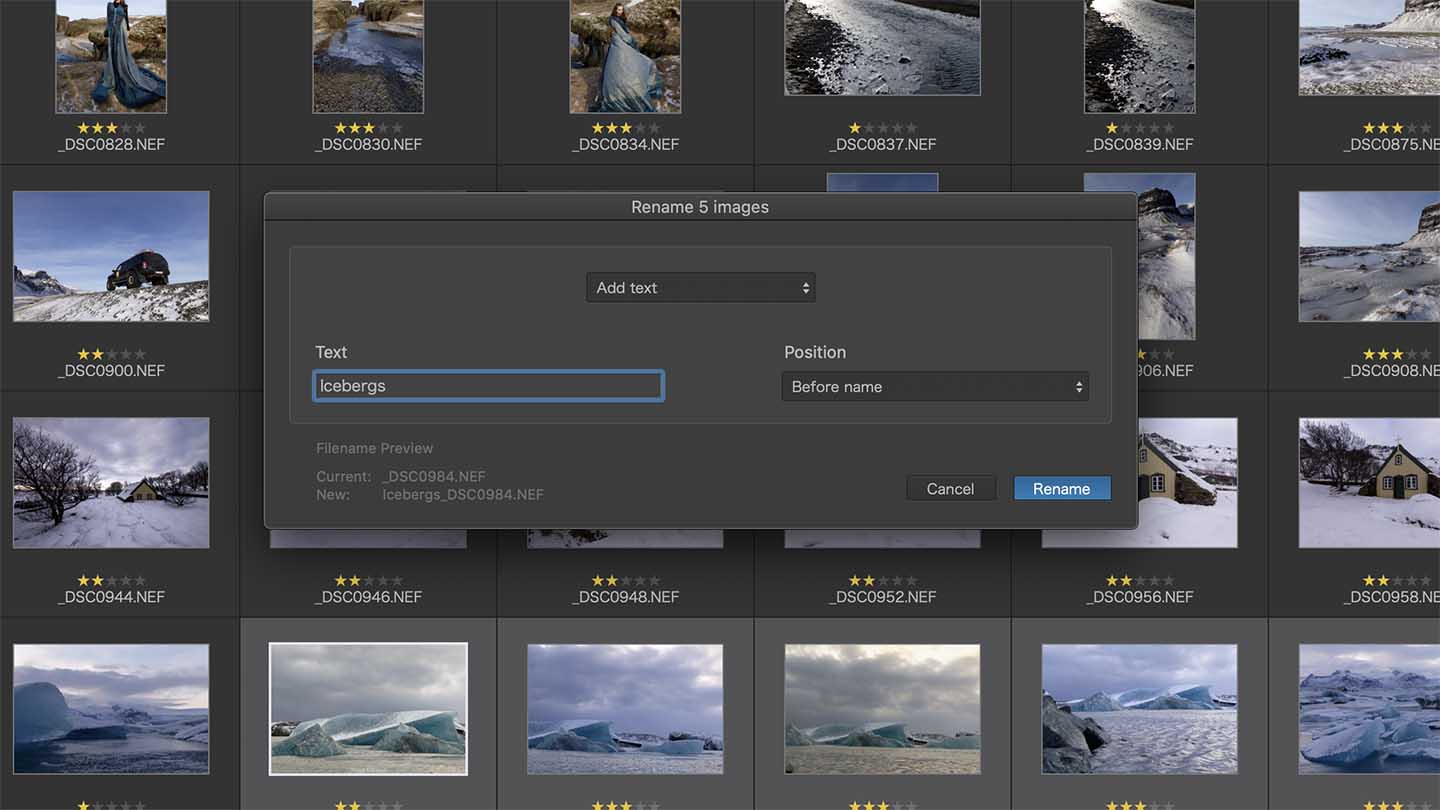
Batch Editing
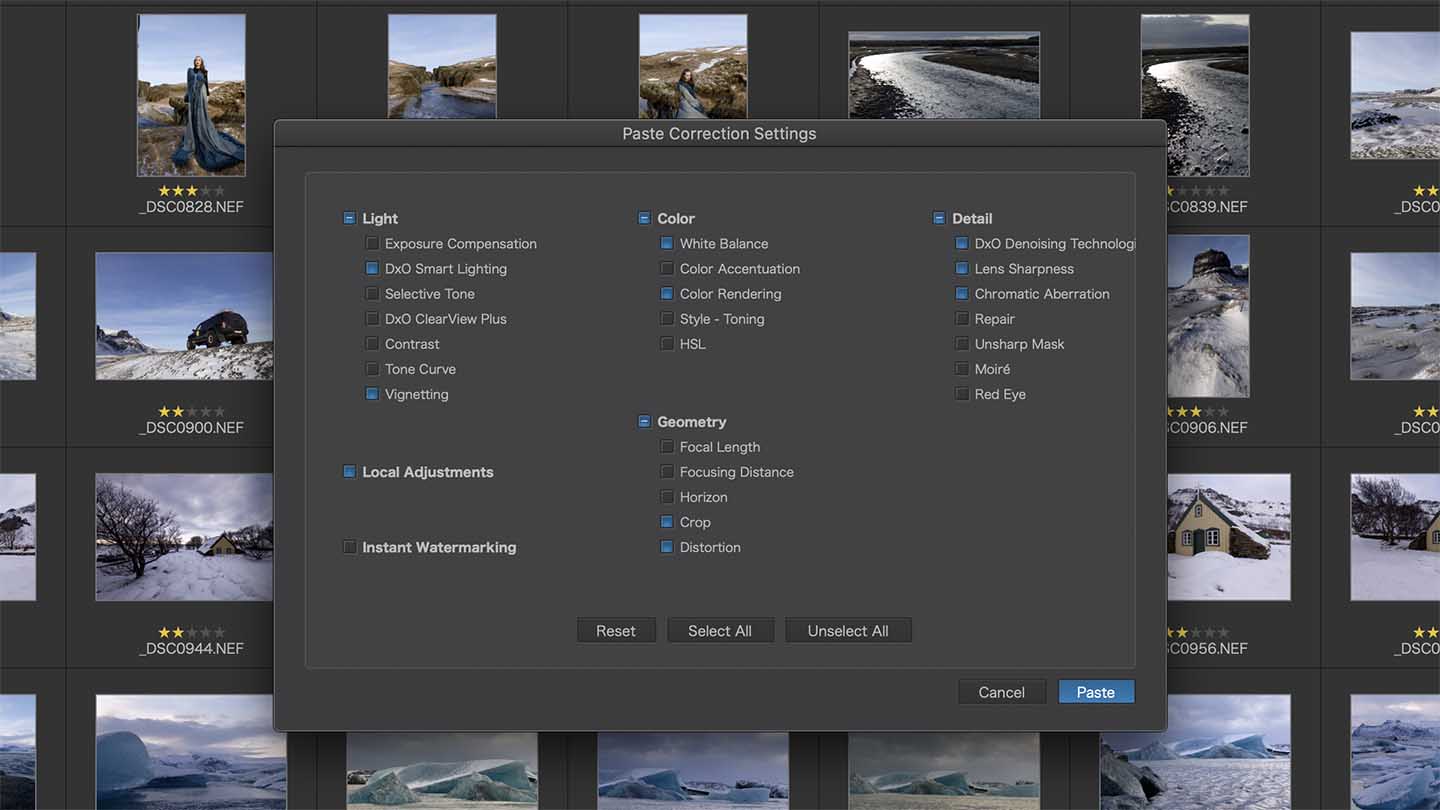
If you shoot a collection of images in the same conditions, the chances are that you’ll want to apply the same edits to them. Happily, batch editing was added with PhotoLab 4.
This is another simple process, just select the image that you want to use as the edit donor, then select Image > Copy Correction Settings in the menu bar. Next, select the images that you want to apply the edits to and select one of the paste options from Image in the menu.
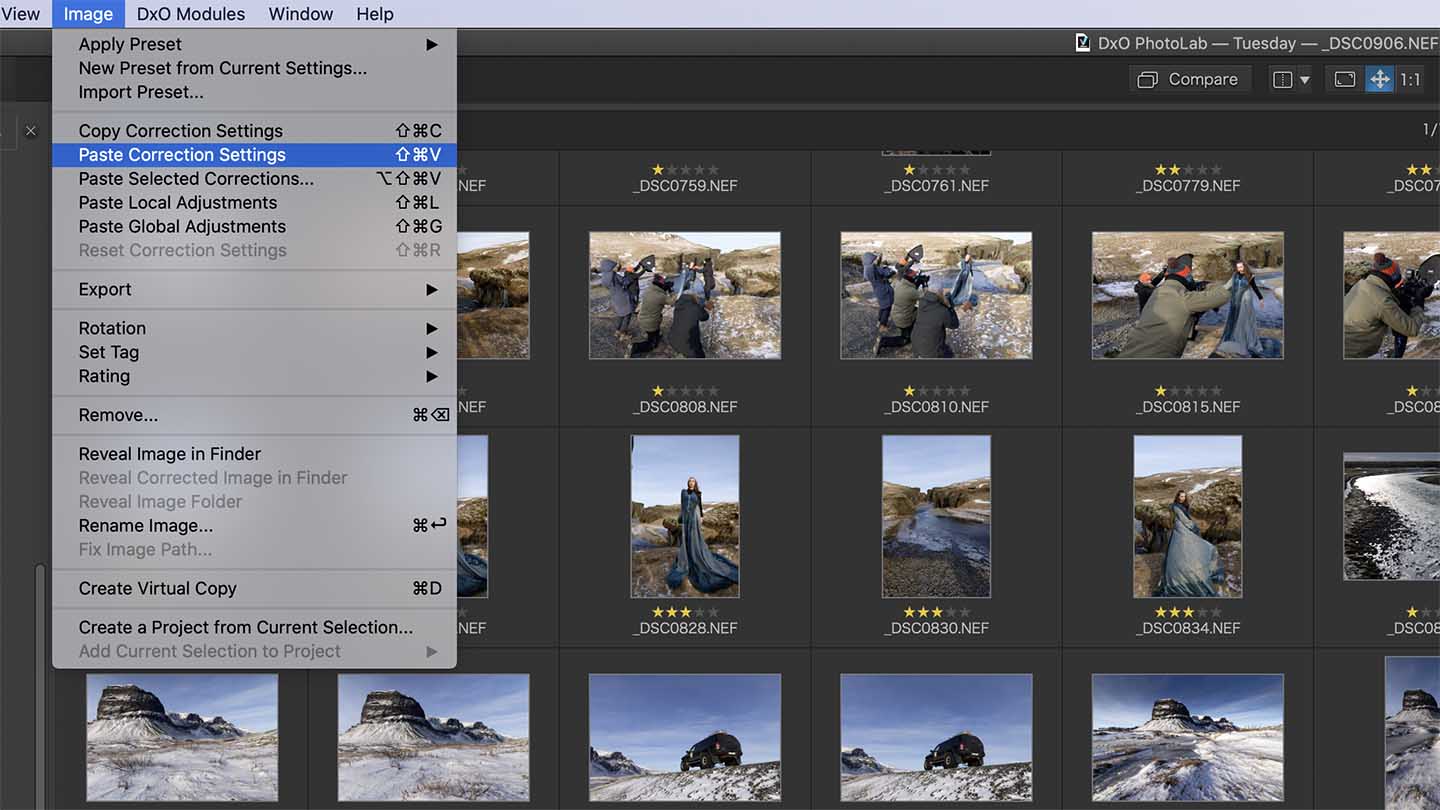
If you opt for ‘Paste Selected Correction Settings’ you are able to pick the edits that you want to apply from the panel that appears.