


Once you’ve got to grips with the basics of your GoPro, you’ll more than likely find you’ll what to discover what your GoPro Hero can do aside from filming straight HD video footage. Each model has a selection of different shooting modes and resolutions that can be quickly accessed through the camera or by using the GoPro app (We’ll look at the app later).
These additional modes offer a huge variety of options both in resolution and frame rates, as well as giving you creative control over the type of footage captured.
The best way to get started is by taking a look at the different camera modes and experimenting with what they do. In this chapter we’ll take a look at getting started with accessing the modes and settings hidden within your GoPro Hero.
GoPro Hero’s different shooting modes
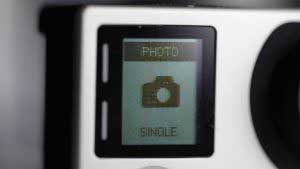
As well as video there are a selection of other modes open for use on the GoPro Hero. To access these modes (photo, burst or time lapse) make sure the camera has stopped recording and then quickly press and release the power button on the front, as you do this you’ll see the icon on the LCD change showing the selected mode, for example if the camera shows a stills camera icon you’re in photo mode. Now push the button on top to take a photo, the other modes all work in exactly the same way across the GoPro range, power button to change mode, shutter button to start and stop.
Main menu Settings on the GoPro Hero

To access the cameras main menu (Setup) which features the Language, White balance and video format options use the power button to flip through the modes until the LCD shows the Setup icon, then click the top button to select, now the power button can be used to scroll through the options and the top button is used to select, at the end of each screen is an Exit option that will bring you back to the previous screen.
Side button on the Silver and Black to access settings
Both the GoPro Hero4 Silver and Black feature a button on the side, and again as with the power button this has a dual use. Hold it down for a couple of seconds to activate Wi-Fi or press it in quickly when you’re in any shooting mode and the settings for that mode will appear.
The GoPro Hero4 models give you a good selection of options for each mode. The Hero on the other hand only offers basic settings adjustments with the main settings menu only enabling you to change the cameras generic settings such as time and date.
Settings you need for good quality footage from your GoPro Hero4

When you’re just starting out it’s difficult to figure out what type of video settings you should be using so here’s a quick guide.
The following is relevant for all models when it comes to getting the best quality from your camera. Once you’ve skilled these standard settings then you’ll start to know how to adjust them depending on what it is you’re filming.
We want to start to select the videos resolution and frame rate and for all GoPro’s so that they are set to 1080p resolution, that’s full HD, and we’ll set the frame rate to 30fps. This resolution and frame rate will match the vast majority of home HD TV’s so you can ensure that your footage will play back smoothly if connected to a TV and at the same time should look fine on both computers and mobile devises.
The way to select the resolution is slightly different on the Hero compared with the Black and Silver versions but once the resolution settings have been found the process for all is the same.
Setting resolution and frame rate on the Hero
For the Hero (Base model) use the power button to scroll through to the video mode and click the top button to enter, now use the Settings / Tag button on the side of the camera to open the video options and use the Power / Mode button to scroll to the resolution and shutter button to select and scroll through the options to 1080p. Tap the Settings / Tag button to exit.
How to set resolution on the GoPro Hero
- Tap the Power / Mode button until you see the video icon
- Tap the Settings / Tag button on the side of the camera
- Tap the Power / Mode button until you see the resolution option
- Tap the Shutter button to scroll through the options
- Tap the Settings / Tag button on the side of the GoPro to Exit
- The GoPro resolution has been changed
How to set framerate on the GoPro Hero
- Tap the Power / Mode button until you see the video icon
- Tap the Settings / Tag button on the side of the camera
- Tap the Power / Mode button until you see the FPS (Frames Per Second) option
- Tap the Shutter button to scroll through the options
- Tap the Settings / Tag button on the side of the GoPro to Exit
- The GoPro resolution has been changed
Setting resolution and frame rate on the Hero4 black and silver editions

The GoPro Hero4’s navigation was greatly improved over previous version and saw the double use of the Wi-Fi button on the side double as a direct access settings button.
To adjust the resolution of the video that you’re shooting, make sure that you’re in video mode and then give the Wi-Fi / Settings button a quick push. This will bring up the video options, now use the power button on the front to scroll through the options and select res, hit the shutter button on the top of the camera and again use the power button to scroll through the different options. To start with pick 1080p at 30fps as this will playback on most common devises. Scroll down to exit or leave the buttons alone for 10 seconds and the GoPro will automatically return to the main menu.
How to set resolution on the GoPro Hero4 Black / GoPro Hero4 Silver
- Tap the Power / Mode button until you see the video icon
- Tap the Wifi button on the side of the camera
- Tap the Power / Mode button until you see the resolution option
- Tap the Shutter button to scroll through options
- Tap the Wifi button on the side of the camera to set and exit
- The GoPro resolution has been changed
How to set framerate on theGoPro Hero4 Black / GoPro Hero4 Silver
- Tap the Power / Mode button until you see the video icon
- Tap the Wifi button on the side of the camera
- Tap the Power / Mode button until you see the FPS (Frames Per Second) option
- Tap the Shutter button to scroll through options
- Tap the Wifi button on the side of the camera to set and exit
- The GoPro frame rate has been changed
In the next part I’ll take a look at some of the different ways you can attach your camera safely.