


There’s nothing that quite competes with a good black and white image. Remove the colour, and it’s down to the shadow, highlight and tone to reflect the mood.
As you get into monochrome, you realise what a distraction colour can be. A successful black and white make the most of tone and light and in many cases can create a far more emotive image than its colour equivalent.
Today we almost all shoot digital, and while there are black and white digital cameras out there, the Leica Monochrom being the most prevalent, these cameras are not in the mainstream.
However, if you want to shoot black and white, then many cameras will have a monochrome mode or image applied effects.
Fujifilm cameras are exceptionally well equipped, with sets of tradition monochrome Fujifilm stocks that can be applied to jpegs.
Fujifilm even gives you the option to apply these effects to their RAW files through the RAW conversion software.
While many cameras will have a black and white mode, in most cases the image captured will be a JPEG, with an in-camera effect applied.
If you want to shoot black and white, then it’s better to shoot in RAW. These files may be in colour, but with more image data, there’s more latitude for adjustment.
It’s then a case of using your image development software such as Lightroom or a dedicated filter set such as DxO SilverFX to make the monochrome conversion.
Being able to convert a colour image to black and white should be easy, after all, you’re just stripping away the colour. But, as with colour, correct colour management is essential.
Why do you need to manage colour for black and white?
The basic principles of colour management are the same for both colour and black and white imagery. You need to be sure that the monitor is displaying the correct colour, tone, brightness and contrast.

If your monitor is too bright, then it’s likely that the image on the screen is going to be showing you shadow detail that doesn’t exist and when it comes to printing it’s going to print dark.
While an overly bright monitor is bad for colour, it’s worse for black and white as issues with shadows and highlights are far more apparent.
Likewise, with the colour that’s captured, those different colours in your image will display as different tones when converted to black and white. Therefore you want to be sure that the tones you’re seeing and adjusting on screen are correct.
Calibrating your monitor is the first step when it comes to enhancing black and white images. Essentially making sure that the monochrome image you see on screen is monochrome.
Once the monitor is calibrated, then it’s time to look at your output, and this is where there is a difference between colour and black and white management.
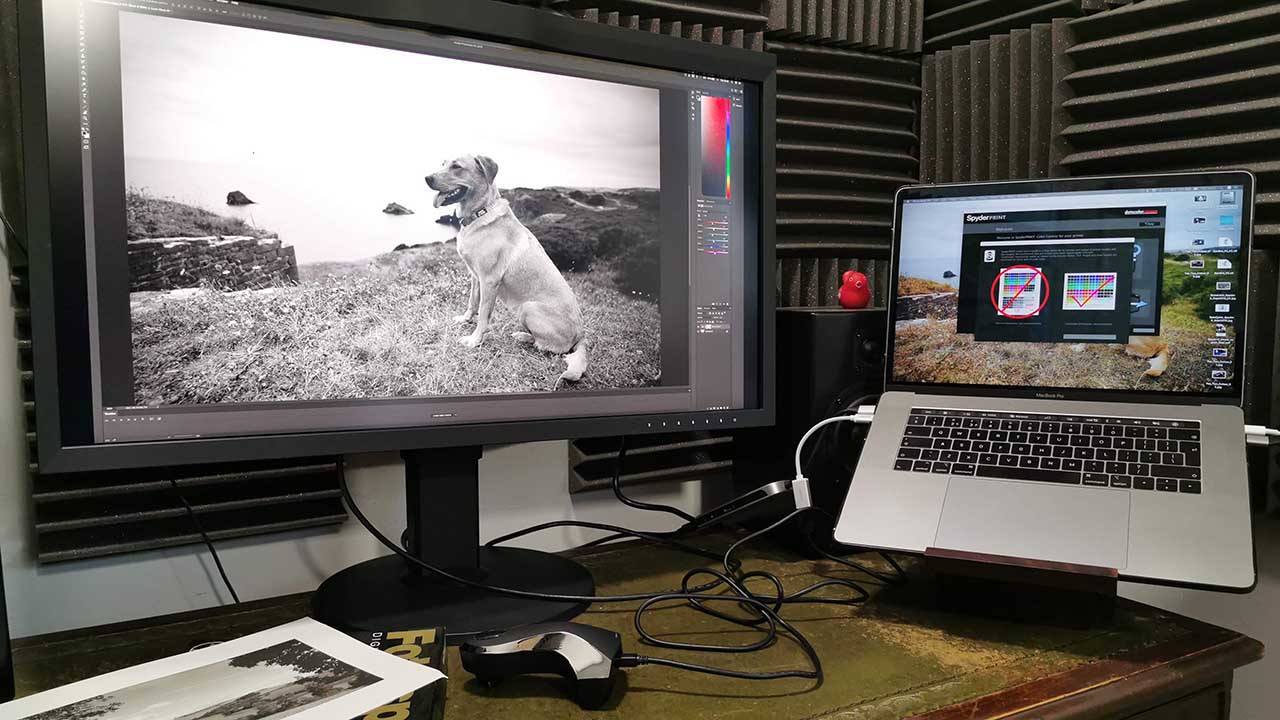
As with colour printer calibration, a SpyderPrint is essential to ensure that the printer is outputting correctly.
Then with the SpyderPrint software loaded and SpyderPrint hardware attached you can select from a series of colour charts.
Amongst these are several that have been designed for black and white photography. These greyscale charts can be printed in the same way as standard charts and are then scanned with the hardware to create the black and white print profile through SpyderPrint.
The process does take a while and involves you manually scanning the print, but it will make a real difference to the print quality.
Using the spyderPrint will fine-tune the settings of the monitor, printer and most importantly paper, so that brightness, tone and contrast match.
Each paper you use will react to the inks differently, so a separate profile must be made for each paper stock you use.
Black and white printing is incredibly satisfying, and with the assistance of the SpyerPrint, you can produce incredible results.
As with colour photography, colour management for black and white is essential. Done right good black and white colour management will ensure you produce striking monochrome prints every time.
Upgrade to DataColor SpyderX Pro or SpyderX Elite
From 9th to 15th September 2019 @Datacolor will be carrying out an upgrade promotion!
To discover more on the offers available check out bit.ly/2lJBLec