


Learning how to use your camera’s drive mode options in the optimum conditions is a crucial first step towards helping you become a more versatile photographer who can take pictures in a wide variety of situations. Below we explain how your drive modes work, and how and when to use them.
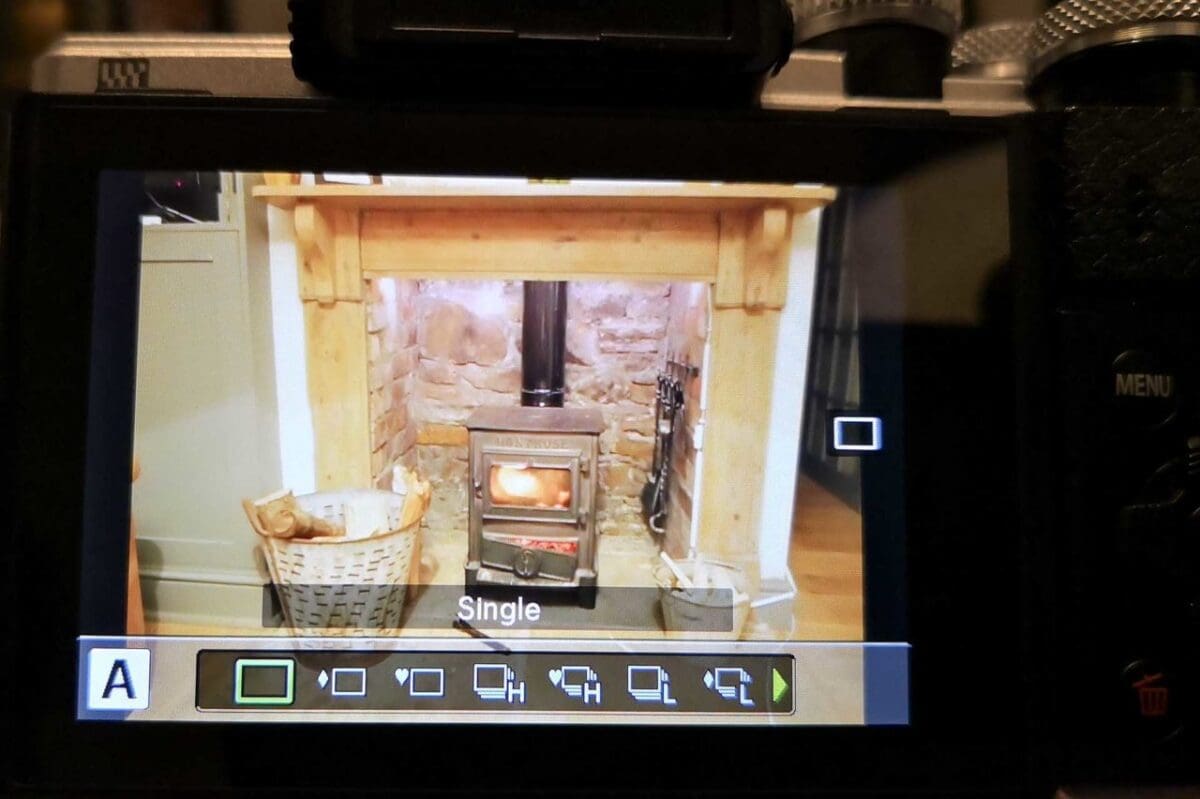
Single image shooting
Using your camera’s single image drive mode does exactly what it says on the tin: every time you press the shutter button it records a single photo. In fact, the camera will still take just one picture even if you keep your finger down on the shutter button.
This drive mode often ends up being the default setting for many photographers, as it allows those with slower reflexes to avoid taking extra photos and filling up their memory cards. What’s more, single image shooting is a useful drive mode for photographers who like to shoot subjects like still life, landscape photography and portrait photography where you have a bit more time with your subjects and scenes.
However, you should probably avoid this option when shooting action because the act of lifting your finger and repressing the shutter will mean you are likely to miss crucial frames.
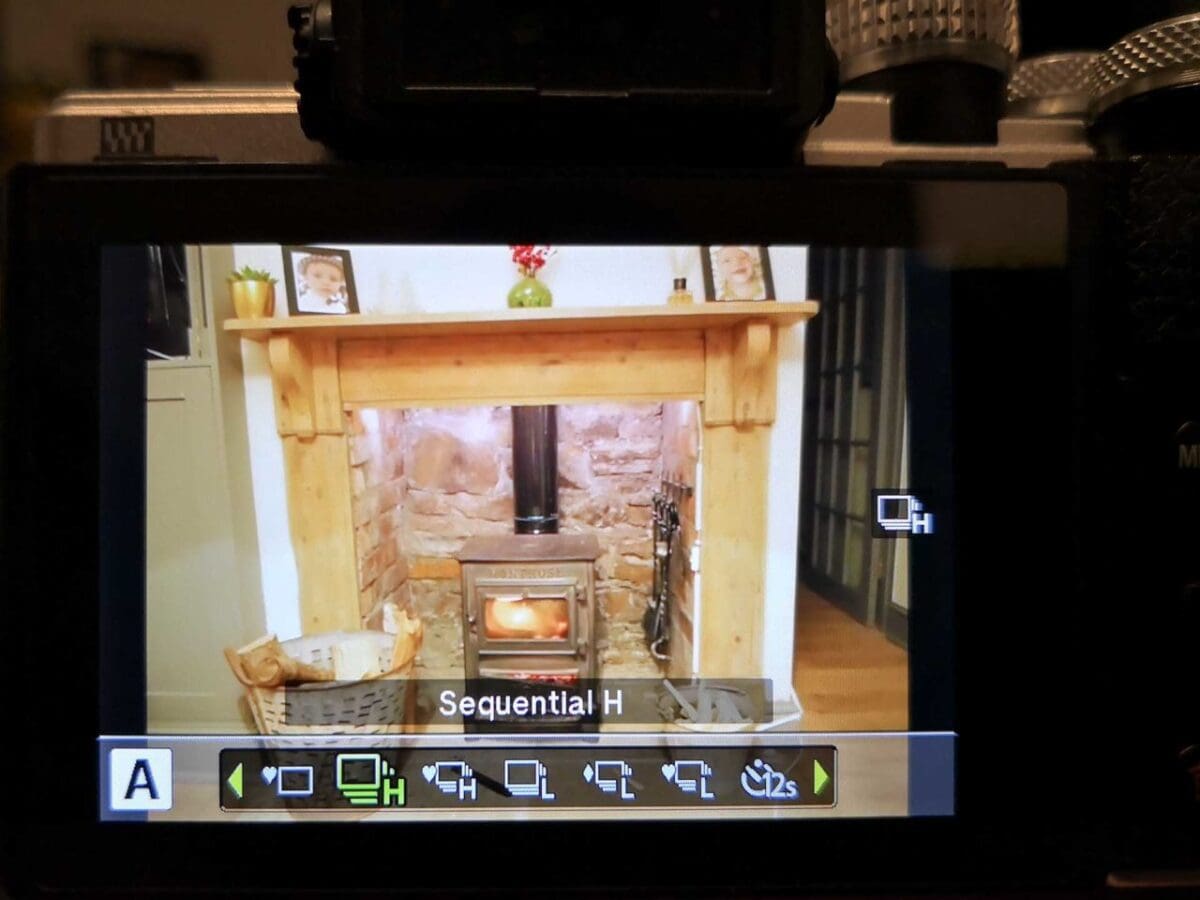
Continuous shooting
When using this drive mode, your camera will take photos for as long as you keep your finger pressed down on the shutter release button – or until the camera’s buffer (its temporary memory) or memory card is full. When using continuous shooting mode you will also want to consider which AF mode to use.
For instance, if you are using your continuous AF mode your camera will attempt to re-focus your shot in between frames. If you set your camera to its single autofocus mode (S-AF) it will set the focus at the start of your sequence of shots.
Something else to consider is that most modern cameras now offer two continuous shooting drive modes: high and low. Sports photographers, and those who shoot moving targets like wildlife or planes, might opt for the high continuous shooting mode which employs your camera’s fastest possible frame rate to capture a sequence. However, be warned that some cameras struggle to focus continuously when shooting at these high frame rates.
One workaround that we like to use: if your fast-moving subject is moving towards or away from the camera, set the low continuous shooting mode so that your camera can focus the lens in-between images in the sequence.
And while we may think of the continuous shooting driving mode as solely an option for sports and action photographers, it can also be quite useful in your everyday photography.
As long as you’re not worried about filling up your memory cards, setting your camera to a continuous drive mode will give you the option to simply keep your finger on the shutter button should something unexpected present itself while you are out taking pictures – such as Bigfoot riding a bike down a remote forest trail!
If you are using the continuous shooting drive mode for your everyday photography, though, consider setting it to the low mode, as this captures frames at a slower rate and keeps you from filling your memory card with gigabytes of unwanted images!
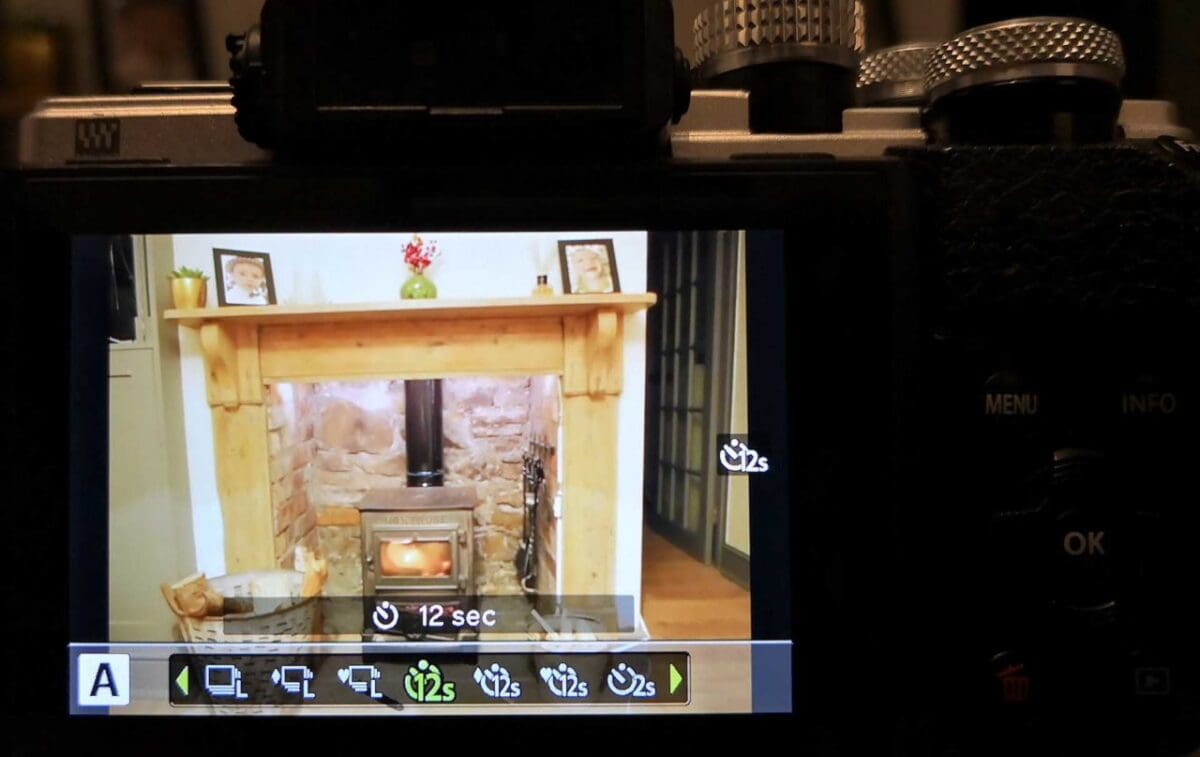
Self-timer
When using the self-timer drive mode, your camera will wait specific number of seconds before releasing the shutter and taking the picture. The number of delay time options varies by brand, but typically most cameras have 2sec and 10sec options.
Your self-timer drive mode is a handy setting for taking group portraits when you want to include yourself in the picture, as it gives you time to run from behind the camera and join the group.
What’s more, it’s a pretty good back-up option for those D’oh moments when you’re shooting a long exposure and realise you forgot to pack your remote release. Your self-timer mode, in these instances, will help you avoid touching the camera at the point the picture is taken, reducing your risk of camera shake spoiling the image. And speaking of remote releases…
Remote release
Some cameras now offer a remote release mode that allow you to fire the shutter using a wireless remote control. You should select this drive mode option when connecting your camera to a remote release. In some cases there are both cable and wireless release options.
Mirror lock-up
To help minimise the blur caused by camera shake, most DSLR cameras feature what is called the Mirror Lock-up mode. However, just to confuse things, this option isn’t always found in your main Drive Mode settings menu. Often it is tucked away elsewhere within your main menu system.
When using your Mirror Lock-up mode, your camera will wait until its mirror has lifted to take a picture. This mode is often used by landscape photographers, macro, still life and night photographers who tend to work with longer shutter speeds, during which the slightest vibration from the camera’s mirror box mechanism can cause camera shake and spoil an image.
Again, it’s best to use your Mirror Lock-up mode with a remote release, and ensure the camera is mounted on a solid tripod.
It’s also worth noting that in most instances you will need to press the shutter release twice to take a picture in Mirror Lock-up mode. The first press will lift the mirror, and then the second releases the shutter. That said, some cameras have streamlined the process and only require one press, which automatically trips the shutter after a short delay.
It’s also worth noting that some DSLRs, namely Nikon cameras, offer both Mirror Lock-up and exposure delay modes. The difference here is that Nikon’s exposure delay mode releases the shutter automatically following a short delay once the mirror has lifted. Mirror Lock-up requires the standard two presses of the shutter release to take the picture.
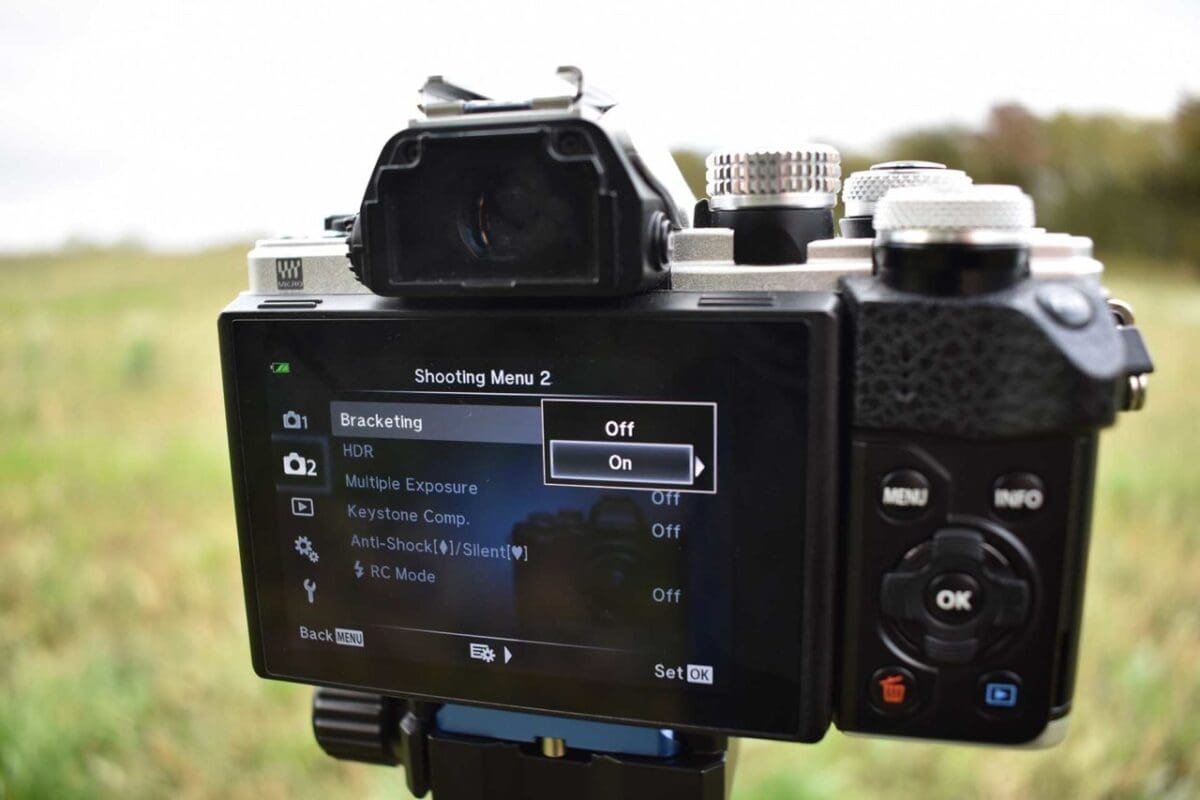
Auto-Exposure Bracketing
Your camera’s auto-exposure bracketing mode is another useful feature that photographers use quite often. If you’re unfamiliar with the concept of bracketing, generally it means taking a series of images, each at slightly different settings, and choosing the best one.
You’ll want to use your auto-exposure bracketing mode in situations where you are unsure about the best camera settings to use for your scene. A common way to use the auto-exposure bracketing mode is to set the camera to capture three frames: one at your specified exposure settings, plus one with more exposure compensation and one with less. You can adjust and fine tune the level of over- and under-exposure you want the camera to record.
And while we said three images, most cameras allow you to capture more than three frames in a bracketed sequence; however, it will always be an odd number. And you can typically specify the order in which your frames are taken.
What’s more, on many cameras you can also set your camera to its continuous shooting drive mode and employ bracketing so that your sequence of images is produced from one press of the shutter button. If using your single shot drive mode you will need to trip the shutter for each frame.
Finally, many new cameras – particularly mirrorless cameras – now offer additional bracketing options such as Film Simulation mode or Art Filter mode. When you select these modes your camera will produce several versions of an image, and you can choose the best one in playback mode.